RSS Feed

‘Recipes’ Category

  1. Poulet en Croûte

    February 4, 2015 by Daniora

    IMG_6994

    Today’s recipe is another one from my childhood. My mom used to make this for us. It was one of those meals that always felt really special. I’ve put a couple of little twists on it myself, but at it’s heart, it’s the same.

    So, ‘poulet en croûte’ translates to ‘chicken in crust’. Loses some of the mystique in English, doesn’t it?

    The name is simple and the execution is even simpler. The beauty of this recipe is how impressive it looks, especially for the amount of effort.

    The ingredient list is short and sweet:

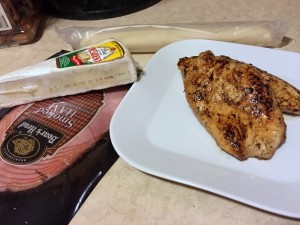
    Just four ingredients...

    Just four ingredients…

    • Chicken breast, one per serving. For this particular application, I used Perdue marinated chicken breasts. They were the perfect size for wrapping in the pie crust and were incredibly flavorful.
    • Sliced ham, one or two slices per serving. Mine was rather thinly sliced, so I opted for two.
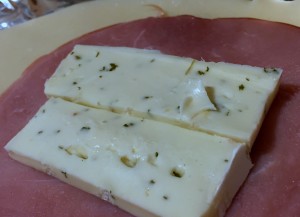
    • Brie, sliced about 1/4″ thick. I usually use plain, but this time I accidentally grabbed herbed brie. I noticed my mistake and went to put it back, but decided that more flavor couldn’t be a bad thing.
    • Pie crust. I use the refrigerated kind that comes rolled. Each crust will be enough for two servings.

    That’s it. Now to put them together.

    Browning the chicken.

    Browning the chicken.

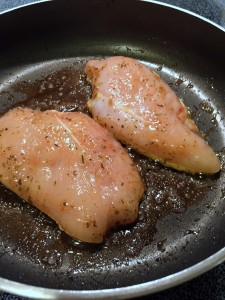
    The first step is to brown both sides of the chicken breast. This will add flavor and help sear the juices into the chicken. I had my pan a little hot, so some of the herbs from the marinate got a bit scorched, but there was no real harm done.

    Next, unroll your pie crust. Letting it come to room temperature first makes this a far easier task. Slice the crust in half. If you’re extra concerned about presentation, you can reroll each half to make it a more square shape. This will help later when it’s time to wrap the chicken, but isn’t strictly necessary.

    Ham...

    Ham…

    ... and cheese.

    … and cheese.


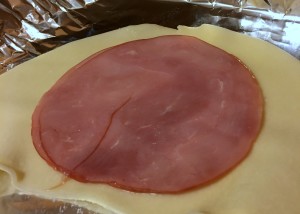
    In the center of the crust, place your ham. On top of that, place your brie. I was feeling saucy, so I put two slices. There is the possibility (well, probability, really) that no matter how well you wrap your chicken, some of the melted brie is going to ooze out. So, starting with more will increase the amount we’re left with, right? Yup, logic sounds good to me.

    Ugly.

    Ugly.

    Pretty!

    Pretty!


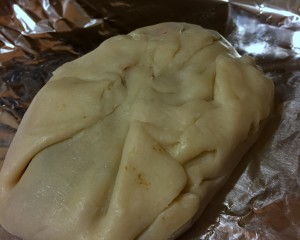
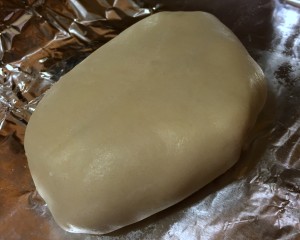
    On top of the brie, place your browned chicken breast. Gently wrap up the edges of the pie crust. This is the part where you’ll realize that rerolling the crust to be the right shape might have made things easier. Never fear, however, it doesn’t matter how ugly this seam is because it will be on the bottom. Seal it as well as you can to keep the brie from escaping.

    Ready to go!

    Ready to go!

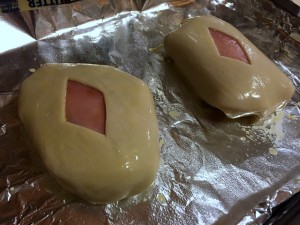
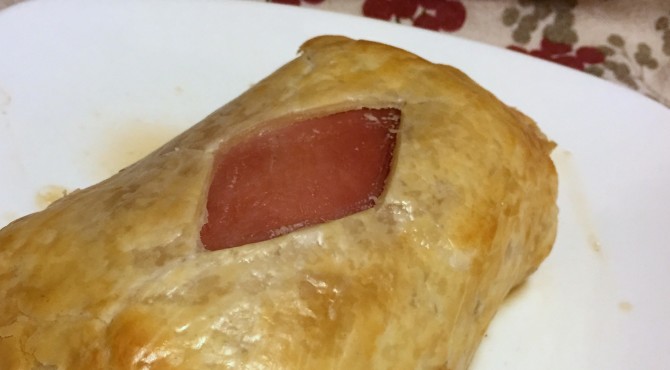
    Place the packets seam side down on a baking sheet lined with foil (because escaping brie). If you’re feeling fancy, and I frequently am, you can use a paring knife to cut a diamond shape in the crust, exposing the ham underneath. Brush a quick egg wash on the crust to help give it a golden finish.

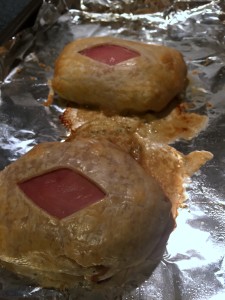
    I warned you about the escaping brie.

    I warned you about the escaping brie.

    Bake them in the oven for 25 – 30 minutes until the internal temperature of the chicken reaches 165°. Plate and serve. Simple. Elegant. Delicious.


  2. Making Marshmallows: Part 2

    January 28, 2015 by Daniora

    IMG_6669

    So, in the last post, we went over the basics of how marshmallows are made. Once you have a good grasp of the concept and a couple of successful batches under your belt, you can start expanding your marshmallow prowess.

    Before I get back into the marvels of marshmallows, you’re gonna need something to do with the piles of them you’ll be creating. Sure, there are lots of possibilities.  You can absolutely just eat them as they are. Dip them in chocolate or melt them on cookies. There are even entire cookbooks dedicated to various permutations of s’mores that can be made. As there is about two feet of snow outside my door right now, though, I’m going to suggest the classic choice:

    Hot chocolate.

    Here at the Nerdly Home, however, we do not stop at powdered packets of Swiss Miss. Not that there’s anything wrong with powdered hot chocolate. It is certainly convenient in a pinch, and many of them can be quite tasty. No, what I’m suggesting is actual drinking chocolate.

    ‘What’s the difference?” you may ask. And if you do, I’ll know that you’ve never had drinking chocolate before.

    There seems to be no real consensus on the ‘proper’ way to make drinking chocolate. This actually works in our favor. We can now adapt the recipe entirely to our own personal preferences. Try new things. Experiment! With chocolate! For science!
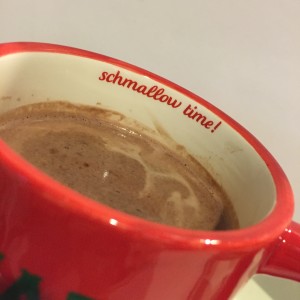
    It's schmallow time!

    It’s schmallow time!

    The basic building blocks of drinking chocolate are 2 ounces of finely chopped chocolate and 8 ounces of milk. The milk is heated and the chocolate is melted into it. Simple enough, yes? Good. Now comes the fun part.

    Your choices in chocolate are almost endless. You can choose your preference of milk or dark (or white, I suppose, but that’s not really chocolate). Or try a mix. Use leftover chocolate chips or candy bars. I’ve even used a few slices of a chocolate orange. Some recipes call for also adding cocoa powder and sugar to the mix. I personally haven’t found either of these necessary; I generally prefer to simply add more chocolate if it’s lacking flavor.

    There are also options when it comes to your milk. Skim, whole, something in between, all fine. I haven’t tried using non-dairy milk, but I’m sure it would work just as well. Some even suggest using half and half, but that’s a bit much for me. A little splash of cream at the end is decadent. Whipped cream on top? Why not!

    The final step is deciding if you’re going to add any extra flavorings to your chocolate. Cinnamon and chili turns it into Mayan chocolate. A tiny pinch of salt can help balance the sweetness of the chocolate. Cloves, cardamom, and allspice are also contenders. Maybe a shot of espresso to give it a kick. And you’ll rarely go amiss with a splash of vanilla. These are all options you can change based on your taste and mood.

    Of course, there is one other way to add extra flavor to your already decadent drinking chocolate. You can always float a few flavored marshmallows on top. Yes, that’s right. Flavored marshmallows. While vanilla is a classic flavor, it is by no means the only one. The possibilities, I have discovered, are endless. Some are certainly more successful than others, but that shouldn’t stop us from trying things. Because science.

    The simplest way of changing the flavor of your marshmallows is to substitute a different extract in place of the vanilla. Peppermint marshmallows are a popular choice, since mint and chocolate go so well together, and they are the result of this kind of simple swapping of flavorings. You can also add a couple of drops of food coloring to the mix to tint them, helping to indicate the flavor. There are a variety of other extracts available that you could use to make your marshmallows a little less ordinary.

    I was looking for something a bit more involved.

    My first foray into alternatively flavored marshmallows was a big one. With my love of all things pumpkin, I took a leap and tried out pumpkin spice marshmallows.
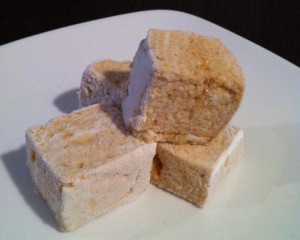
    It's like a pumpkin pie, only light and fluffy.

    It’s like a pumpkin pie, only light and fluffy.

    The process was very similar to the vanilla marshmallows, just with the addition of pumpkin puree into the gelatin and the extra spices. The resulting marshmallows were yummy. They had that classic pumpkin spice flavor that I, as a dyed-in-the-wool New Englander, crave the second there’s that first hint of crisp autumn chill in the air. The consistency of these was tricky, though; they were extra sticky. No matter how many times I tossed them in the powdered sugar, they would inevitably wind up all stuck together into one mega marshmallow again. I have a feeling that this is the result of the extra moisture added by the pumpkin puree.

    The less-than-ideal solution that I eventually stumbled upon was letting them sit out in the open air for a couple hours. This let the very outer layer get just stale enough to keep the moisture contained. They lost some of that heavenly soft texture, but they didn’t stick together anymore.

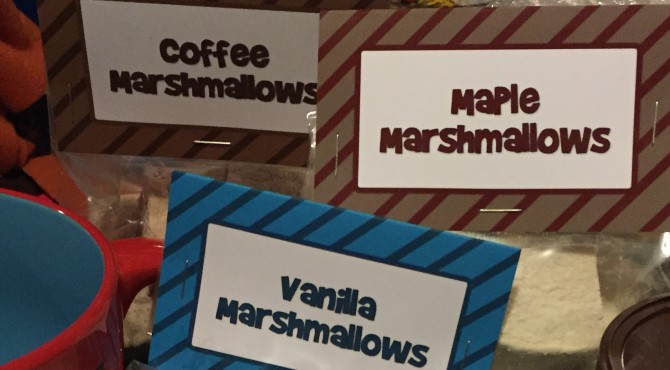
    Browsing through marshmallow recipes, I found lots of interesting options. The next one that caught my eye enough for me to decide to give it a try was a gift from my new favorite organization: the Federation of Quebec Maple Syrup Producers (seriously, they have maple recipes for everything). Yup, that’s right. Maple marshmallows.
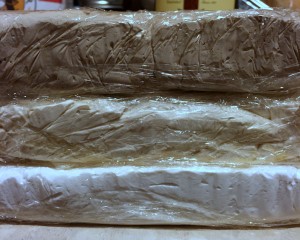
    From top to botom:  Coffee, maple, vanilla

    From top to botom:
    Coffee, maple, vanilla

    The cool thing about this recipe is that you replace the sugar and the corn syrup with maple syrup, which you then cook down. For this recipe, I do recommend using the candy thermometer as recommended. It’s basically the only way to know when you’ve boiled enough water out of the syrup. Added benefit of making these: the house smells like maple syrup for hours. Delicious.

    I happened to have some leftover maple sugar in the cabinet from a previous baking project. I remembered learning that if you found yourself in need of powdered sugar, you could put granulated sugar in a food processor and pulverize it. I was a little concerned about the confectioners’ sugar overpowering the maple flavor, so I did make a little bit of maple powdered sugar to mix in. It worked perfectly, with one exception. I opened the top of the food processor too soon and inhaled quite a cloud of maple powder. It’s alright, though. I have Canadian heritage; that stuff’s probably in my blood already.

    The third and final marshmallow adventure for this round was completely irresistible. Coffee marshmallows. When melted into a nice, rich hot chocolate, the resulting beverage is a mocha delight.
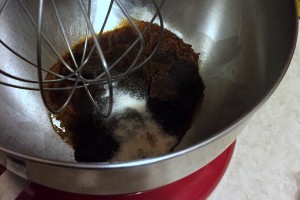
    Gelatin blooming in cold espresso.

    Gelatin blooming in cold espresso.

    The flavoring for these beauties comes from replacing the cold water used to bloom the gelatin with strong, cold espresso. It’s a neat way to add flavor without changing the process or consistency. This recipe also adds a little cocoa powder. This helps add color to the finished marshmallows and balance out the harsh coffee flavor with smooth chocolate notes. I also added some cocoa powder to the powered sugar I used for dusting. It helped them retain their identity as ‘not vanilla’ marshmallows and added just a little more flavor.

    This is certainly not the last time we’ll talk about marshmallows. In case you hadn’t noticed, I’m rather a fan. I’ve got a lot of things that I still want to try. Almost any flavor out there, there’s probably a marshmallow recipe for it.
  3. Making Marshmallows: Part 1

    January 26, 2015 by Daniora

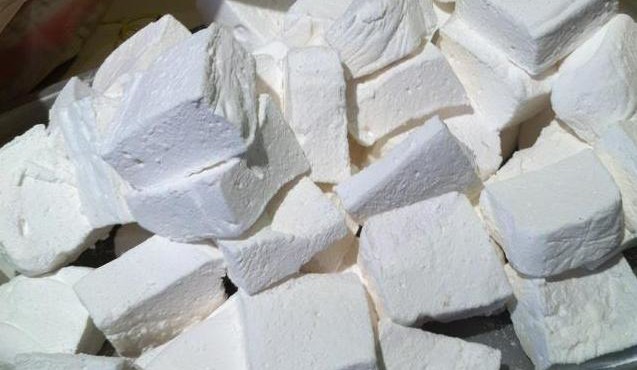
    Marshmallow pile

    Some people will tell you that cooking is art. Some say that it’s science. There are plenty of valid arguments for both sides.

    Making marshmallows is freaking magic.

    No, I’m serious here. It is one of the most delightful feats of alchemy turning sugar, water, and gelatin into light, fluffy marshmallows. It’s something that requires a little bit of know how and the proper tools, but really, what doesn’t require those things.

    Telling people that I’ve made marshmallows is invariably met with a level of incredulity that none of my other endeavors face. I’ve made a name for myself as someone who can do anything. I’ll chalk this up to my vastly varied interests and eclectic skill set. Somehow, though, these same people who tell me that I can do anything are the same ones who say “You can’t make marshmallows”.  As if somehow to imply that these confections simply appear from some other dimension to make gooey s’mores or melt in our hot chocolate.

    Not that the truth is much less miraculous.

    So, let’s start at the beginning. There are five basic ingredients to a marshmallow: gelatin, water, sugar, corn syrup, and flavoring. Simple enough and readily available. The real secret lies in how you put them together.

    Vanilla marshmallow

    Vanilla Marshmallows

    Ingredients:

    • 3 (1/4-ounce) packages unflavored gelatin
    • 1/2 cup cold water
    • 2 cups granulated sugar
    • 2/3 cup light corn syrup
    • 1 teaspoon pure vanilla extract


    1. Prepare a 9″x9″ baking pan with cooking spray and plastic wrap (more about this in a bit)
    2. Bloom the gelatin: Place the 1/2 cup of cold water in the bowl of a stand mixer fitted with a whisk attachment. Sprinkle the unflavored gelatin over the water. Let stand for 10 minutes.
    3. In a medium saucepan, combine sugar, corn syrup, and 1/4 cup water. Place saucepan over medium-high heat and bring to a boil; boil rapidly for 1 minute. Remove from heat, and, with the mixer on high, slowly pour the boiling syrup down the side of the mixer bowl into gelatin mixture.
    4. Beat on medium high speed for 12 minutes until white and fluffy.
    5. Add vanilla extract and stir for 1 additional minute until well combined.
    6. Spray a spatula with cooking spray. Pour the marshmallow mixture into the prepared pan and spread evenly with the prepared spatula. Cover with additional plastic wrap. Allow to sit for 4 hours or overnight.
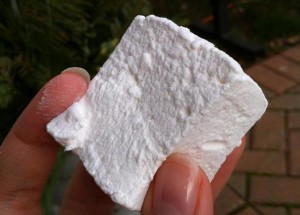
    7. Dust a cutting board with confectioners’ sugar. Turn the set marshmallows onto the cutting board. Remove all plastic wrap. Cut marshmallows into desired size (I like mine about 1″ square) using a sprayed sharp knife. Place confectioners’ sugar in a large bowl. Working in batches, add marshmallows to bowl and toss to coat. Finished marshmallows can be kept in a plastic bag or airtight container.


    And just like that, you’ve made marshmallows from scratch. Now, there are a few little tips and tricks I’ve learned along the way that make the job easier.

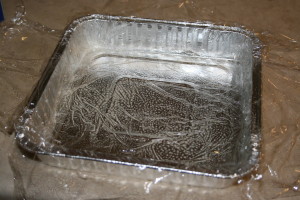
    Marshmallow is extremely sticky stuff. Preparing your pan is one of the most important steps. I usually use a glass pan, but as I was making several batches, I wound up moving to aluminum pans, which worked out just fine. I first spray the pan with a light coating of cooking spray. This will help keep the plastic wrap in place. Next I line the pan with plastic wrap, leaving enough overhang on the edges that I will be able to fold it up to cover the marshmallow while it sets. Don’t worry about getting it smooth; the wrinkles won’t be noticeable in the finished marshmallows. Once the pan is lined, I then spray the plastic wrap with cooking spray.

    Prepared pan

    Aluminum pan lined with plastic wrap and generously sprayed with cooking spray.

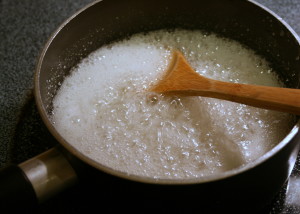
    I’ve been through a few different recipes for marshmallows. Many of them require using a candy thermometer to bring the syrup up to the proper temperature. None of the recipes agreed on exactly what that temperature should be. Getting ingredients to the right temperature for the right amount of time is, of course, the trickiest part of any sugar work. However, it seems to me that this more simple process of letting it come to a rapid boil for 1 minute resulted in the best texture and consistency. Some of the other batches wound up a bit tougher, almost rubbery. These were soft and fluffy.

    Double, double toil and trouble;  Fire burn, and 'shmallows bubble.

    Double, double toil and trouble;
    Fire burn, and ‘shmallows bubble.

    I know a stand mixer is rather a large item to be a necessary piece of equipment. I suppose this could be managed with a hand mixer, but it’d be a trickier proposition. It’s nice to have that 12 minutes of ‘set it and forget it’ to clean your cooking utensils of hot sugar syrup before it hardens. It’s this process of whipping air into the sugar syrup as it cools that turns it into the fluffy, sticky mess we’re looking for. This is so magical, in fact, that I made a time lapse of it…

    The beginning is a little rough from all the steam clouding the lens as the initial heat is released from the syrup. And right at the end, if you watch the side of the bowl carefully, you can see a big splatter… That would be the part where I was focused so much on capturing the time lapse, that I neglected to think about how hot the mixture still was and how volatile vanilla extract is. So, yeah, that’s basically the result of all the alcohol in the extract I thoughtlessly dumped into the bowl vaporizing immediately. Whoops. They turned out just fine in the end, though.

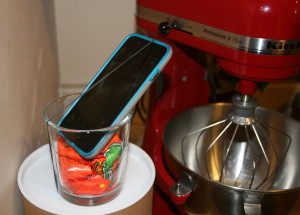
    Now this is some professional set up...

    Now this is some professional set up…

    Stay tuned for more marshmallow talk where we’ll talk about just some of the flavor possibilities.


  4. Squash Pudding

    January 19, 2014 by Daniora

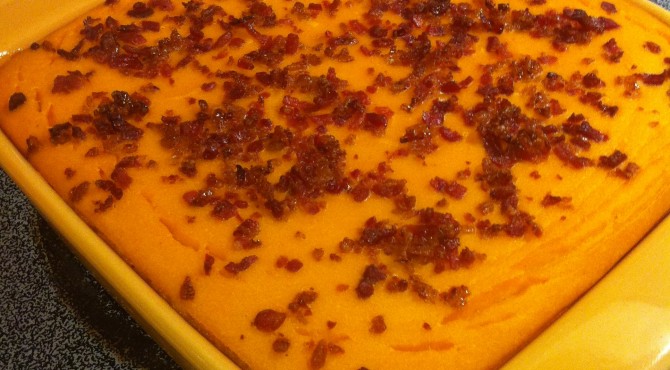
    SquashPudding

    I think it’s true of every family that there are certain dishes that we grow up with that we assume everyone else knows about too. For me, squash pudding is probably top of the list.

    bill-cosby-jell-o-pudding

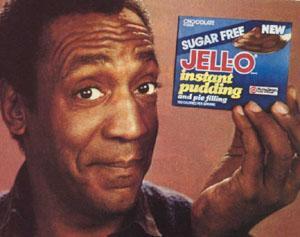
    Here in the States, when we hear the word “pudding”, it generally conjures images of Bill Cosby selling SnakPacks of vanilla and chocolate swirl. This particular recipe uses the British meaning of pudding, savory ingredients bound together with eggs and flour which are baked, boiled, or steamed to hold them together.

    Squash puddings takes butternut squash, which is delicious and perfectly good for you all on its own, and transforms it into something calorie laden and irresistible. One of my nephews refuses to touch vegetables; I’ve seen him pick tiny pieces of chopped spinach out of pasta sauce. He will, however, sit down to a heaping pile of squash pudding and devour it without blinking an eye.

    Squash Pudding

    Ingredients:

    • 8 Tbs butter
    • 2 tsp salt
    • 5 Med butternut squash (8 cups mashed and drained)
    • 1 Tbs dried onion flakes or fresh minced
    • 4 tbs dried milk
    • 4 eggs
    • 4 tbs Wondra flour
    • 4 tbs brown sugar


    1.  Mix all ingredients together, making sure butter melts completely. Beat until smooth.
    2. Spread in baking dish and sprinkle with bacon bits (if desired). I am personally pretty done with the whole “bacon makes everything better” bit, but in this case, I really do recommend it. The salty bacon really does a lot to balance the sweet squash.
    3.  Bake at 300 degrees for 1½ hours.


    A few notes from my own personal experience.

    First of all, this recipe works equally well using frozen squash. It’s so convenient just to grab a few of the oh-so-attractive frozen bricks from the store and throw them into a pot. I’ll admit that I almost never go through the trouble of boiling and mashing fresh squash anymore.

    Secondly, a word on Wondra flour. Wondra flour is ground superfine, designed to mix more smoothly into liquids like gravy and prevent clumps. In a pinch, I’ve used regular all purpose flour instead and have yet to encounter a problem. I find a good whisking manages to eliminate any little clumps that might appear.

    Thirdly, and very importantly, remember to remove the squash from the heat when you whisk in the eggs to prevent them from cooking before they’re mixed in. Not that I’ve ever done that, mind you…

    This is one of my favorite side dishes and is one of those simple, handy recipes that can be prepared in advance and reheated for mealtime.


  5. Gluten-Free Chocolate Peanut Butter Cupcakes

    December 14, 2013 by Daniora

    IMG_7711

    You may have discovered by now, dear readers, that I am a fan of celebrations. Any excuse to gather people together, have good food, and generally promote warm and fuzzy feelings is fine by me. Recently, it was our store manager’s birthday. While working retail may not be my ideal situation, I at least have the advantage of working in a place where we all feel like family. So there was no way this occasion was going to pass by unmarked.Edit

    Here’s the catch: He’s gluten-free.

    I’m not one to panic about such obstacles. I was, however, determined to make something outstanding. I’ve cooked for vegetarians, vegans, diabetics, and people with nut allergies (fortunately, not all at the same time). Adding a few gluten free recipes to my repertoire wouldn’t be bad. Chocolate and peanut butter are his favorites, so I went looking for something.

    Flourless chocolate cake is a popular option for going gluten free. My problem with this is that it tends to be super rich and heavy. Not ideal for a casual mid-afternoon in-the-breakroom celebration. I really wanted cupcakes.

    Fortunately, I stumbled onto this recipe from Chocolate & Carrots. It had all the qualities I was looking for. Perfect. Alright, here we go…

    Gluten-Free Chocolate Peanut Butter Cupcakes


    Ingredients

    • 1 (15.5 oz) can of reduced sodium black beans, drained and rinsed


    Wait, what? Did I read that right? Yes, yes I did. Okay, okay, no one panic. I mean, beans in desserts aren’t entirely unprecedented. There are Chinese red bean cakes, for example. ::deep breath:: Alright, I’m sure these will be good. Let’s just keep going and see where this all goes.

    Gluten-Free Chocolate Peanut Butter Cupcakes


    Ingredients

    • 1 (15.5 oz) can of reduced sodium black beans, drained and rinsed
    • 4 eggs
    • 1 tablespoon vanilla extract
    • 5 tablespoons unsalted butter, or coconut oil
    • 3/4 cup cane sugar
    • 5 tablespoons special dark cocoa powder
    • 1 teaspoon baking powder
    • 1/2 teaspoon baking soda
    • 12 Reese’s Peanut Butter Cups, unwrapped


    1. Preheat oven to 350°.
    2. Line a 12 cup muffin pan and spray with cooking spray.
    3. Blend the beans, 2 eggs, vanilla and sugar in the food processor (or blender) on high until completely blended.
    4. In a small bowl combine the cocoa powder, baking powder and baking soda.
    5. In a large bowl, beat the butter/coconut oil until fluffy.
    6. Add the remaining two eggs and beat well after each egg.
    7. Beat in the bean mixture.
    8. Beat in the dry ingredients.
    9. Beat for 1-2 minutes.
    10. Pour the batter into the prepared pan and place a Reese’s cup on the top.
    11. Bake for about 20-25 minutes until the cupcakes are cooked completely.
    12. Allow them to cool completely before icing.


    Peanut Butter Frosting

    Ingredients

    • 1 cup creamy peanut butter
    • 5 tablespoons unsalted butter, softened
    • 2 cups powdered sugar
    • 1/2 – 2/3 cup whipping cream (heavy cream)
    • 12 miniature Reese’s Peanut Butter Cups
    1. Beat the peanut butter, butter and powdered sugar until combined.
    2. Add in the whipping cream and beat until light and fluffy.
    3. Use a piping bag with your favorite decorating tip and decorate the cupcakes or use a knife and spread to decorate the cupcakes.
    4. Decorate with a mini Reese’s Peanut Butter Cup.


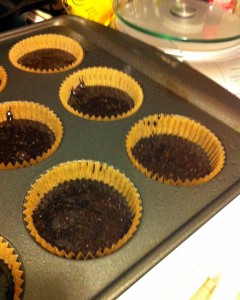
    Okay, not going to lie, the whole beans-eggs-sugar concoction in the food processor was kinda gross looking. I did my best to press on and finish the batter. When it was all together, it looked and smelled like cupcake batter. I was starting to feel better about things.

    IMG_3685

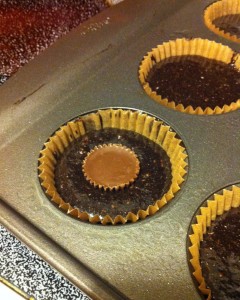
    Then, I added the mini peanut butter cups. This really made me feel better about things.
    IMG_3686
    As they baked, I couldn’t help but feel like these cupcakes were a lie of GLaDIOSian proportions. They certainly did make my house smell chocolatey.  Once they were out and frosted, I was really happy with how they looked. There was only one test they had left to pass.

    IMG_7706
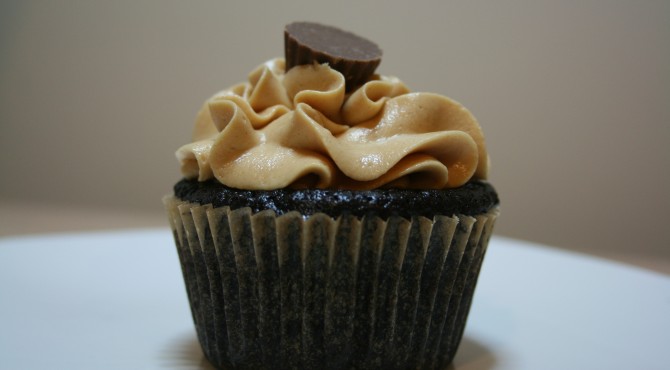
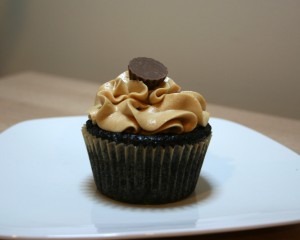
    I brought them in to work the next day. Let me tell you, they were delicious. They were light and fluffy, not at all heavy like a traditional flourless cake. This peanut butter frosting is amazing; it’s definitely a recipe I’ll be using on other chocolate cupcakes.

    I would make one minor change to the entire process. I think it would work better to let the cupcakes bake about 5 minutes before putting the mini peanut butter cup in the center. As it was, they sank to the bottom instead of being stuck in the middle. Other than that, I couldn’t be happier with the outcome.


  6. The Biggest Batch of Cranberry Sauce Ever

    November 17, 2013 by Daniora

    Cranberries02

    Autumn in New England means a lot of things. Leaves changing, the chill in the air, pumpkin flavored EVERYTHING. It’s also cranberry harvest time. Thanksgiving is coming, and no turkey dinner would be complete without cranberry sauce.

    I will admit that I am a big fan of jellied cranberry sauce from a can. It’s yummy and comforting. However, it can’t hold a candle to home made.

    When I started making my own cranberry sauce, I used to use the basic recipe from the bag consisting of cranberries, sugar, and water. Those ingredients, when combined over heat, do certainly make something one could consider cranberry sauce. It’s just not particularly good.

    This recipe came to me a few years ago from a friend of mine, and I’ve been making it every year since. The addition of apples, citrus, and sweet raisins can make a cranberry skeptic into a fan.

    This year, I decided to go big. The recipe takes a bit of time to make, and so I figured I’d just make all the sauce I’d need for the entire holiday season in one go. That means there was canning involved.

    Now with real cranberries!

    Now with real cranberries!

    Cranberry Sauce

    Ingredients


    • 1 (12-ounce) bag of fresh cranberries, cleaned
    • 1 3/4 cups sugar
    • 1 Granny Smith apple, peeled, cored, and chopped
    • 1 orange, zest grated and juiced
    • 1 lemon, zest grated and juiced
    • 3/4 cup raisins


    1. Cook the cranberries, sugar, and 1 cup of water in a saucepan over low heat for about 5 minutes, or until the skins pop open.
    2. Add the apple, zests, and juices and cook for 15 more minutes.
    3. Remove from the heat and add the raisins.
    4. Let cool, and serve chilled.


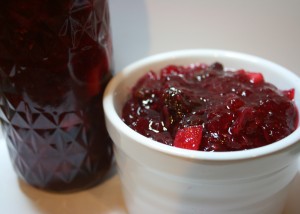
    Simple! Couldn’t be easier! Then, just put it in a jar and you’re all set! Piece of cake!

    Okay, well, actually the recipe is really easy, and if you’re just making a single batch for nearly immediate consumption, it works out quite well. When you decide to triple the recipe and then can it, things get slightly trickier.

    Let me walk you through how the process actually goes.

    First off, put the giant pot of water for canning on the stove. This will take about 3 years to boil, so get it started early. Put the clean jars in so that they can boil and sterilize.

    Cranberries

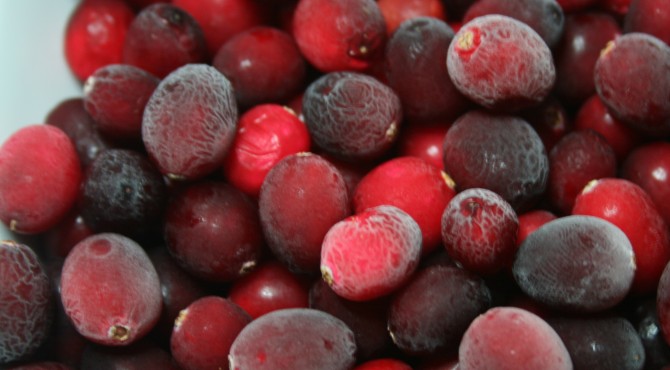
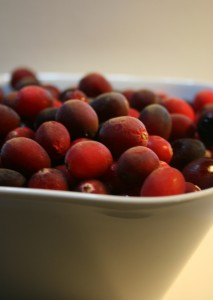
    Next, take the three bags of cranberries out of the freezer. They’ll be in the back, under all the other stuff. Dump them into a bowl. Now, you’ll need to sort through them, pulling out any little bits of stem or any shady looking cranberries. Your fingers will get cold. Rinse the berries off and put them in the pot. You will second guess the size of the pan you have chosen, but will go with it anyway. You hope this isn’t a mistake.

    Add the recommended amount of water.

    Do the math for the amount of sugar you need for a triple batch of sauce. Check the math. Check it one more time. Measure out the sugar, trying not to think about it. Dump it into the pot with the water and cranberries. You will now have a mass of frozen cranberries with an uncomfortable amount of sugar on top. This is perfectly normal. Turn on the heat.

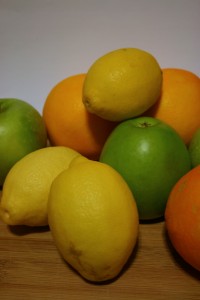
    Fruit

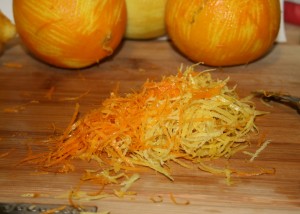
    While your cranberry-sugar monstrosity thaws, it’s time to deal with the other fruit. Peel the apples. This takes way longer than you think it should. Every time. Cut the apple into tiny little pieces. Admire your excellent knife skills. Turn your attention to the citrus fruit. Look for the zester. It will not be in the drawer where you think it should be. Ask other utensils if they’ve seen it. Once you find it, remove the zest from the citrus, careful not to get any of the pith. This will yield a lot of zest. *Added benefit: Your hands will smell like citrus for hours.
    Zest

    Zesty!

    By this time, the cranberry sauce over on the stove should have started to heat up. You know things are progressing when you can hear the hiss and pop of the berries exploding. This is a good thing. Once most of the berries have started popping, add the zest and the apple pieces. Stir well.

    Cut the zested fruit in half. Juice said fruit into the pot of cranberry sauce. *Pro Tip: Squeeze citrus fruit into your hand over the pot in order to catch any rogue seeds. Nothing ruins Thanksgiving like biting down on a lemon seed.

    Let the sauce cook for a good 15 minutes. This will help release the pectin from the apples, helping your cranberry sauce gel later on. When everything is nicely cooked, turn off the heat.

    Once the sauce is ready and the jars are sterilized, it’s time to put the two together. Suddenly remember that you have to add the raisins. Dump them in and stir. Then you’re ready to can.

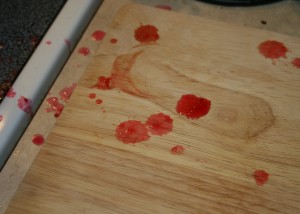
    I’m going to let you in on a little secret. Every photo you’ve ever seen of someone in a pristine apron lovingly ladling jam into a jar with a serene smile is a lie. These calm people are not spooning molten hot fruit-and-sugar based napalm into tiny glass jars. They’re all staged. Real canning is messy, serious business. There are reasons why I never post photos of canning in progress; it’s not pretty. By the time I’m done, my counter top looks like something out of Dexter.

    Oh, the horror!

    Oh, the horror!

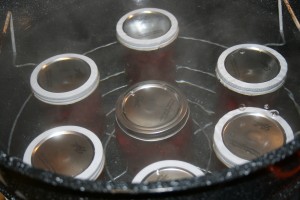
    Once the jars are filled, the rims have been wiped clean, and the rings have been screwed on tight (“Yup, I’ll just grab this jar and screw on this metal ring. Oh, that’s right, it’s filled with magma.”), then they go back into the giant pot of water to boil for 15 minutes. After that, it’s a simple matter of letting them cool.
    Canning
    All joking aside, it is a lot of work, but getting all this done ahead of time will save me a lot of heartache in the end. I always wind up cooking lots of complicated things for holiday gatherings; it’s who I am. Having this one thing done early will come in handy.
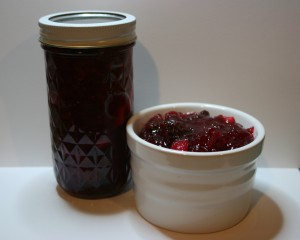
    FinishedProduct


  7. Carrot Pineapple Cake

    November 13, 2013 by Daniora

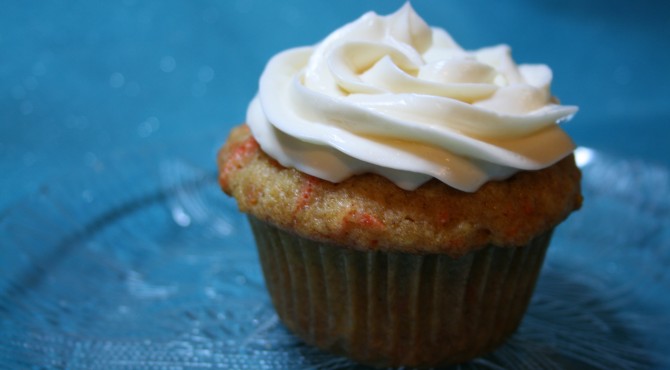
    FinishedCupcake

    Guys, I’m not exaggerating here when I tell you that this is the most delicious carrot cake you will ever eat. That’s not hyperbole, it’s just the honest truth.

    Preview

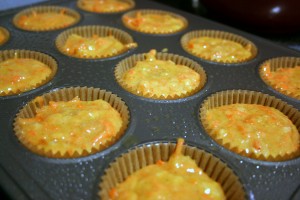
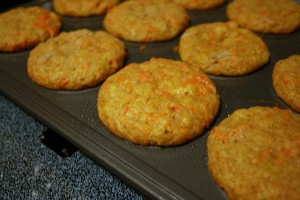
    The original recipe is designed to be  bundt cake with a vanilla glaze. It also works perfectly well as cupcakes with cream cheese frosting. The baking instructions below are for the bundt cake. For cupcakes, I cook them for about 25 minutes, rotating halfway through. (You do rotate your pans while you’re baking, right? Good.) I was worried that they were taking so long to cook, but I fill my cupcakes pretty full and this particular batter just takes a while to cook. Keep an eye on them; better to check on them more often than have them burn.

    ReadyfortheOven

    Some people like nuts or raisins in their carrot cake. While that may not be my personal preference, it’s easy to add them to this recipe; just mix them in at the end. I like to add about a quarter teaspoon of cloves in addition to the nutmeg and cinnamon. Cloves are my favorite spice, and they give it a warm sweetness.

    CupcakeTray

    I’m serious, though. This is the best. If you enjoy carrot cake even a little, you owe it to yourself to bake these (or get someone else to bake them for you).

    SoloCupcake

    Carrot Pineapple Cake

    • 3 cups all purpose flour
    • 2 cups sugar
    • 1 teaspoon baking powder
    • 1 teaspoon baking soda
    • 1 teaspoon salt
    • 1 teaspoon nutmeg
    • 1 teaspoon cinnamon
    • 3 eggs, beaten
    • 1-1/4 cups cooking oil
    • 2 teaspoons vanilla
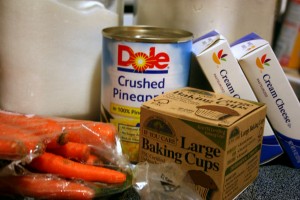
    • 1 cup (8.5 oz can ) crushed pineapple, undrained
    • 2 cups grated raw carrots, loosely packed
    1. Preheat oven to 325. Grease bundt pan.
    2. Mix together flour, sugar. baking powder, baking soda, salt, nutmeg and cinnamon in a large bowl.
    3. Make a well in the center of the dry ingredients and add eggs, oil and vanilla. Blend thoroughly.
    4. Stir in undrained pineapple. Add carrots and pecans. pour into prepared bundt pan.
    5. Bake for 1 to 1-1/4 hours until cake tests done.
    6. Cool 10 minutes in pan, then turn out and finish cooling on wire rack. Add vanilla glaze.

    Vanilla Glaze

    • 1 cup sifted confectioner’s sugar
    • 1 tablespoon milk plus 1/4 teaspoon vanilla
    • 1 tablespoon light corn syrup
    1. Combine all ingredients and beat until smooth. Use spatula or large spoon to put glaze on top of cooled cake. Spread around top of cake with a knife. Glaze should run down sides slowly.

    Cream Cheese Frosting

    • 16 ounces cream cheese, room temperature
    • 1 cup confectioners’ sugar
    • 2 teaspoons pure vanilla extract
    1. Put cream cheese into the bowl of an electric mixer fitted with the paddle attachment. Mix on medium-high speed until smooth. Reduce speed to medium-low, and mix in sugar and vanilla. Raise speed to medium-high, and mix until fluffy, 5 to 7 minutes.

  8. Maraschino cherries, version one

    November 7, 2013 by Daniora

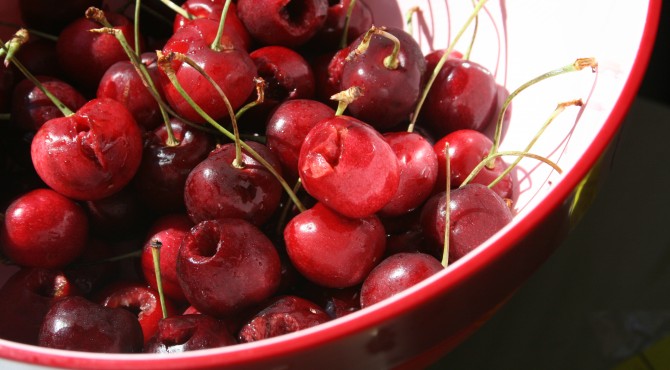
    Fresh Cherries


    I do not like maraschino cherries.

    This is a fact. I used to pick them out of my Shirley Temples, offer the ones off my ice cream sundaes to anyone that wanted them, and sipped around them in my girlie cocktails. Well, it turns out that I don’t like commercially made maraschino cherries.

    Cherries

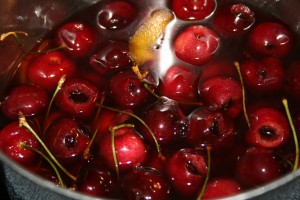
    Making your own maraschino cherries is a fair amount of work. Fresh cherries can be pricy, and they all need to be washed and pitted (messy work). Then they have to be cooked with a variety of ingredients, including pomegranate juice (also pricy) and fresh orange zest. Then once you’ve got these cherries all cooked, you have to put them in jars and into the fridge for three days.  As if that weren’t enough, with no preservatives, they won’t stay fresh for long. This seems like an awful lot of trouble for something that can cheaply and easily be bought in a jar. I mean, how bad could they be?

    Cherry Label

    Oh.

    Okay, then. Homemade maraschino cherries it is! In a discussion with a group of friends, we decided that calories from miniature foods don’t count. I countered that I make things from scratch for that same reason; it might not be good for me, but it’s way better than if it were commercially made. For some foods, like these cherries, this is especially true.

    Real maraschino cherries are made by soaking cherries in maraschino liqueur. Who knew? However, most of my goodies tend to be enjoyed by small children, so for most applications, those cherries are not the ones that I need.

    This version of cherries is alcohol free, and I think very tasty. You can add red food coloring to make them look more like store bought, but I have a real distaste for artificial colors. Cherries are red enough on their own.

    Finished Product

    Homemade Maraschino Cherries (adapted from the recipe from Cupcake Project)

    Ingredients

    • 1 1/2 cups water
    • 1/2 cup pomegranate juice
    • 1 cup sugar
    • 3 1/2 fluid ounces lemon juice (juice from about 3 lemons)
    • pinch of salt
    • Peel from one large orange
    • 1 cinnamon stick
    • 1 pound pitted cherries (invest in a cherry pitter, and don’t wear white)Syrup
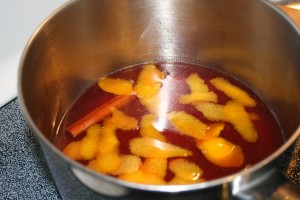
    • In a medium-sized saucepan over medium-high heat, add everything except the cherries.
    • Bring to a boil.
    • Reduce the heat and simmer until the sugar has dissolved, stirring periodically.
    • Add the cherries.
    • Simmer on low heat for 10 minutes or until the syrup has a bit of a cherry flavor. You don’t want to cook the cherries – you just want to bring out some of their flavor. However, I can attest that cooking the cherries really doesn’t hurt. They just turn out a little softer.
    • Remove the pan from the heat and transfer the entire contents to a bowl (so it doesn’t continue cooking).
    • Let cool to room temperature.
    • Transfer to an air-tight container, like glass jars, and refrigerate.
    • Let the flavors develop for about three days, then enjoy!

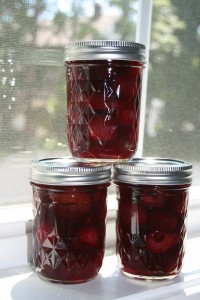
    Waiting the three days for the cherries to be ready is tough. Of course, they taste pretty darn good straight from the pan too.  The syrup is delicious. I’ve made homemade grenadine as well, but the syrup from the cherries would be just as good for making a mean Shirley Temple. These are absolutely worth the effort, and you will never buy a jar of scary cherries again.


  9. The Orange Marmalade Disaster

    May 4, 2012 by Daniora

    It’s getting closer to that time when I get to start canning and making jams, jellys, and preserves again. I’m sure we all remember the yummy strawberry and carrot cake jams of last year. The Nerdly Home is in the process of moving, and we’ll be near a very large weekly farmers’ market, ensuring that I’ll soon be posting lots of pictures of my spreadable triumphs.

    Lest I get too full of myself, I feel I must relate the tale of The Orange Marmalade Disaster.

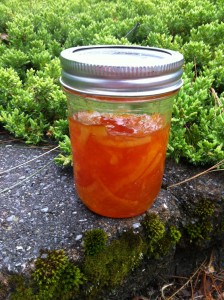
    A lovely jar of marmalade

    That’s some pretty looking marmalade, isn’t it? Looks good enough to spread on a warm crumpet or maybe even a scone. It looks so refined, so elegant.

    Well, it tastes awful.

    I’m not sure why I wanted to make marmalade. I think it had a lot to do with the fact that it was winter, and one of the few things in season and actually worth canning was citrus. When cruising around looking for recipes, I found one from Alton Brown. Not only was it simple, it was from someone whose recipes I trust. I read through the recipe reviews and learned that I’d probably have to cook it longer than the recipe called for, but otherwise, they were all positive. I felt confident in the recipe and felt well prepared.

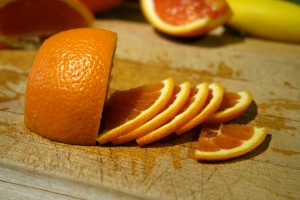
    I went to the store and bought the best looking oranges I could find. I brought them home and lovingly sliced them by hand. I enjoy using these sorts of opportunities to sharpen my knife skills.

    Sliced oranges

    This is the point where we encounter the problem with Alton Brown’s recipe. No where does it tell you what variety of oranges to use. More importantly, it doesn’t tell you what varieties not to use.

    It turns out that navel oranges, the ones that were newly in season and the best looking at the store, have way too much pith (the bitter white stuff) to use in marmalade. Well, you can use them, but you have to peel them, then remove the pith from the peel before adding the peel back into the mix. Juicing type oranges like valencias are much better, since they have a thinner layer of pith. The pith, while bitter, does contain the pectin you need to help your marmalade stay together. It’s a magical balance that takes cooking from science to art.

    So after my hours of careful cooking and canning, I wound up with eight jars of beautiful, bitter, foul tasting orange marmalade. To make matters worse, because of the excess amount of pith, I wound up with a marmalade so stiff, I’m fairly certain that I couldn’t spread it on anything if I tried. I did let the marmalade rest a few days, since some reviews and instructions said that even with the right oranges, the marmalade can be bitter immediately after it’s made and will mellow over time. This didn’t. There’s no saving it.

    So in the near future, when berries and fruits go from farmers’ market to jars in my kitchen with delicious results, let’s all remember the tragedy of the orange marmalade. We’ll call it a “learning experience” and soldier on.


  10. Old Fashioned Apple Crisp

    September 16, 2011 by Daniora

    I hadn’t really intended to do another recipe post this week. When I woke up to a perfect autumn day and a bag of freshly picked apples, I knew a crisp was in the cards for today.

    Apple Crisp

    In general, I don’t really like pie crust.  When buying pies from the local orchard, I always get crumb topped and, more often than not, the bottom crust of my serving gets thrown away. As a result, apple crisp is one of my favorite fruit goodies.

    The fantastic thing about this recipe is that you can adapt it to suit your needs. If your apples are really sweet, you can decrease the amount of sugar in the filling. You can alter the spices if you like. You can leave out the cloves or decrease the amount of cinnamon. I’ve even been known to add a dash of ginger when I’m feeling a little exotic. The warm spices and zesty citrus guarantee delicious results even when using less than perfect apples. Plus, the topping has oatmeal in it; that makes it a breakfast food, right? Right?

    Old Fashioned Apple Crisp

    Filling:

    • ● 5 pounds McIntosh or Macoun apples
    • ● Grated zest of 1 orange
    • ● Grated zest of 1 lemon
    • ● 2 tablespoons freshly squeezed orange juice
    • ● 2 tablespoons freshly squeezed lemon juice
    • ● 1/2 cup granulated sugar
    • ● 2 teaspoons ground cinnamon
    • ● 1 teaspoon ground nutmeg
    • ● 1/2 teaspoon ground cloves


    For the topping:

    • ● 1 1/2 cups flour
    • ● 3/4 cup granulated sugar
    • ● 3/4 cup light brown sugar, packed
    • ● 1/2 teaspoon kosher salt
    • ● 1 cup oatmeal
    • ● 1/2 pound cold unsalted butter, diced


    1. Preheat the oven to 350° F. Butter a 9 by 14 by 2-inch baking dish.
    2. Peel, core, and cut the apples into large wedges. Combine the apples with the zests, juices,
      sugar, and spices. Pour into the dish.
    3. To make the topping, combine the flour, sugars, salt, oatmeal, and cold butter in the bowl of an electric mixer fitted with the paddle attachment. Mix on low speed until the mixture is crumbly and the butter is the size of peas (this can also be done by hand). Scatter evenly over the apples. Dust lightly with a pinch of cinnamon.
    4. Place the crisp on a sheet pan and bake for 1 hour until the top is brown and the apples are
      bubbly. Serve warm (with whipped cream or vanilla ice cream, if desired).