RSS Feed

‘Holidays and Celebrations’ Category

  1. Crêpes

    February 2, 2015 by Daniora

    IMG_6965

    Bonjour, dear readers!

    I just wanted to take a minute here before the main post to give you a little sneak peek at what you can expect for the month of February. When I set about restarting the blog, I made a wishlist of projects and recipes that I want to tackle. It became quite obvious fairly quickly that a large percentage of items on the list were French.

    This isn’t surprising; I’ve been a Francophile for ages. I took French in high school just because I loved it. Heck, even my all-time favorite movie is French. I thought it might be fun to lump a bunch of these projects together into one month long adventure.

    Presenting February ‘en français’!

    I don’t want to give away too much of what I’ve got planned. This will be a very food heavy month of posts. But let’s face it, what could be better than French food? I’ve got a few other tricks up my sleeve, some projects I’ve always wanted to try that I’ve given a French flair. And by the end of it all, there may even be a poodle in a beret (I sure hope that one works out).

    Without further ado, allons-y!

    ———————————————

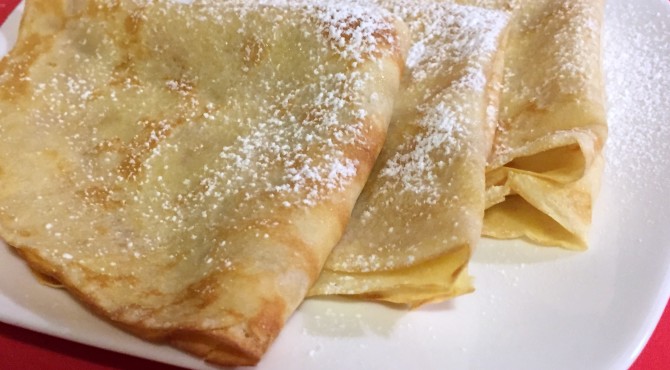
    I’m starting off my French February with one of the most basic and most quintessentially French foods I could think of: crêpes.

    For those of you not in the know, crêpes are French pancakes. They are thin and light, frequently served with some sort of filling. Sitcoms and movies taking place in snooty French restaurants inevitably show someone serving Crêpes Suzette, a dish served ‘en flambé’ (on fire!), frequently, in the case of sitcoms, with hilarious results. They have this mystique about them, when in reality, crêpes are actually rather a simple, down home food. I mean, they’re just pancakes… but everything is a little fancier in French.

    I actually grew up eating crêpes. Well, a version of them. The were generally referred to as blintzes and were my favorite dish picked up from my Lithuanian grandmother.  Ours are filled with farmer’s cheese or a mixture of cheese and ham (or preferably Spam, because say what you will, but that stuff is delicious). They are served with sour cream or apple sauce. It remains the most requested meal when my sister comes home for a visit.

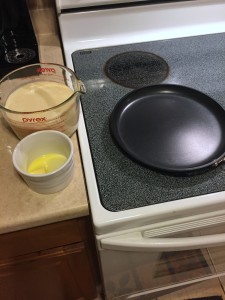
    Here’s the thing: we used to cheat. We always used a crepe maker. Instead of the traditional method of pouring the batter into the hot pan and swirling it around, you instead are bringing the pan to the batter. Dipping it in means that you are pretty much guaranteed the light, even coating every time. It even has an indicator light to tell you when it is ready. Really, very cheaty. But efficient.

    No more! Mostly because, well, I don’t own my own crepe maker. I have decided to learn how to make them properly by hand. I received an awesome new crêpe pan for Christmas (thanks, Mom and Dad!) and today we are taking it out for its maiden voyage.

    Why today? There’s actually a reason.

    When I mentioned to a friend of mine that I was going to tackle this little February ‘en français’ project, he asked if I was writing about crêpes on February 2nd. I replied that I hadn’t really decided and asked why.

    La Chandeleur. Look it up.”

    And so I did and was very glad of it.  In a world that is increasingly shying away from holidays for fear of offending someone, I am on a mission embrace more of them. There should be more holidays, more celebrations, not fewer. And ones that have a food based component, those are even better. This one is now on my list.

    Like Shrove Tuesday, it’s another Catholic holiday based on pancakes. Okay, so maybe it’s not based on pancakes, but that’s the part that we’re excited about today. La Chandeleur, Candlemas, or le jour des crêpes takes place February 2nd, 40 days after Christmas. As with all holidays, there’s a deep history and tradition to the celebration. For our purposes, we need only know that we’re going to celebrate it by eating crêpes. All the crêpes.

    Eat all the crêpes!

    Eat all the crêpes!

    I got my basic crêpe batter recipe from Crepes: 50 Savory and Sweet Recipes by Martha Holmberg. The batter is delightfully simple. Milk, eggs, flour, melted butter. That’s it. Of course, the batter part wasn’t what worried me; after all, I’ve been making it for years. I already knew most of the tricks, like letting it sit (mine sat in the fridge overnight) to let the protein in the flour become properly hydrated and to keep the crêpes tender.

    No, what I was worried about was the part between batter and plate…

    A quick note: documenting something like making crêpes while acting as your own photographer is no small feat. I had delusions of action shots and in progress pictures. Yeah, those didn’t happen. Nonetheless, let’s dive right in.

    It begins...

    It begins…

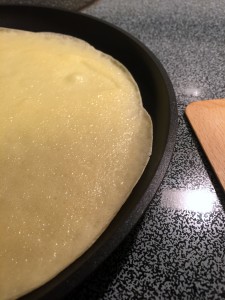
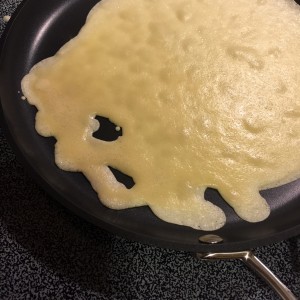
    My very first crêpe was an unmitigated disaster. It was, in fact, too embarrassing to document. Of course, there were a number of factors at work on that one. First off, my batter had separated a little. I thought I had remixed it enough, but I clearly hadn’t. The second was related to the quantity of batter for my size pan. Gauging how much batter to add is a bit of an art and takes practice. So it comes as no surprise that I didn’t nail it on the first shot. The last problem had to do with my new pan. You see, it’s nonstick. So while my cookbook advised me that I would want to add a very light coating of butter for flavor, it really doesn’t need it. This was, in fact, disastrous. The pan became so slick with even the lightest swipe of butter, the batter wouldn’t stick enough to cook. Whoops. Alright, well, after that one finished cooking, I had it another shot.  After all, I had an entire batch of batter to get it right.

    My second attempt. A little thick here and there, but not bad for a rookie.

    My second attempt. A little thick here and there, but not bad for a rookie.

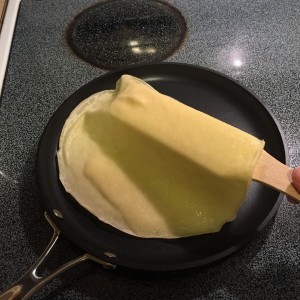
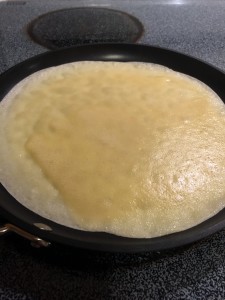
    My second attempt was much better. I managed a mostly even coating on the pan, a little thick in a few places, but not bad. Mostly round. As it cooked, the edges curled up the way they were supposed to. Then I got to use my fancy new crêpe turner to flip it over (I know, I’m ridiculous).

    Curling edges mean it's almost ready.

    Curling edges mean it’s almost ready.

    Crêpe turner, to action!

    Crêpe turner, to action!


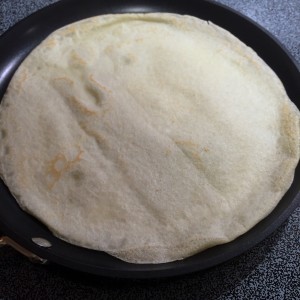
    I was worried about overcooking them, and so this one got turned a little early. It’s a bit anemic, but not horrible. Certainly edible. Most importantly, I was learning.

    A little light, but I assure you, still tasty.

    A little light, but I assure you, still tasty.

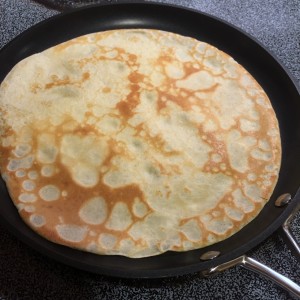
    By about the third one, I kinda had the hang of it. Getting the batter to swirl at the right speed to cover the whole pan takes a bit of doing, but it’s not impossible. I let it cook on the first side for a little longer, waiting for a little browning to appear at the edges. When I finally flipped it, I was ecstatic.

    Et voilà!

    Et voilà!

    Not that it was entirely smooth sailing after that. A few times, I didn’t quite get the batter around the edges and little holes appeared. Some of them I was able to fill in adequately with a few more drops of batter. Others, not so much. All evidence of imperfection had to be immediately destroyed. Delicious, delicious mistakes…

    Quick! Hide the evidence! Om nom nom nom...

    Quick! Hide the evidence! Om nom nom nom…

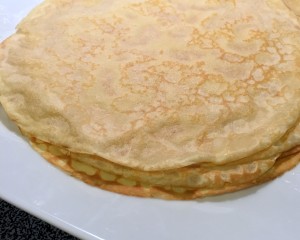
    By the end of my batch of batter, I had made about a dozen really quite lovely crêpes out of the 20 or so that I made. Not a bad ratio for my first time out, I thought. And even the bad ones weren’t terrible. Properly filled or folded and no one would be the wiser.

    What to do with the crêpes once they’re made? That is a subject for another post entirely. Or a whole series of posts, really. The possibilities are endless. Not gonna lie, most of mine were eaten as is, rolled up and scarfed down right from the pan while they were still warm. They can be made ahead and reheated, served with a variety of toppings, fillings, or even be made into a cake. The important part is that now we know we can make crêpes any time we want… which will be all the time.
  2. My Autumn Wreath

    November 12, 2013 by Daniora

    IMG_7624

    Apologies for the fuzzy iPhone photos. In my determination to get this project completed, I neglected to photograph it as well as I should have.

    Since my Halloween wreath is still sitting about 90% finished next to my crafting table, I was determined to get my Thanksgiving one up in a more timely manner.

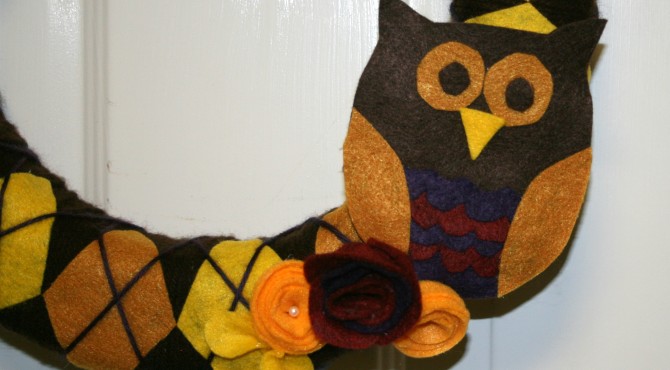
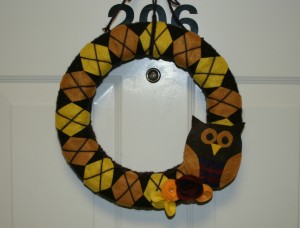
    I wanted something autumnal but not specifically Thanksgiving. I needed something that I could put up for more than a few weeks.  I went browsing around the web and found this precious yarn and felt argyle wreath on Etsy. In my typical fashion, I thought “Hey, I can make that.”

    Let me start by saying that I don’t think I’ll be making another yarn wrapped wreath any time soon. It. Took. Ages.

    ArgyleWreath

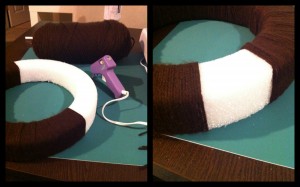
    The difficulty was compounded by the fact that I used a flat ring wreath form instead of a round one. So I’d be going along, wrapping the yarn nicely and then realize that, because the outer circumference is larger than the inner one, that my wrapping was no longer straight. So then I’d have to do this weird wedge backtrack wrapping thing to try and straighten it back out again. Nonsense.

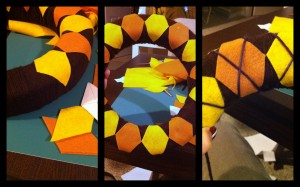
    Once I got the wreath form wrapped, it was time to put the argyle pattern together. I measured out a diamond that I thought would look good and started cutting them out of the two colors of felt. I wasn’t worried about filling the entire space since I was making my little felt owl who would cover any gap in the pattern.  Once the diamonds were glued down, I used a dark purple yarn to crisscross over them completing the argyle.

    ArgyleWreath1Then it was on to the decorations. I found a pattern for a felt owl over at Bugs and Fishes. He went together pretty fast. Then it was just a matter of putting together a few quick felt flowers (another tutorial I’ll have to do in the future) and viola! A wreath. On my door. In time for the holiday!

    How shiny is the paint on our door? Holy cow

    How shiny is the paint on our door? Holy cow.

    Wreaths are one of those things I have come to love about having a place of our own. Wreaths and door mats. The rest of the house may be a disaster a lot of the time, but my front door is always inviting.


  3. Ava’s Hello Kitty Birthday

    November 2, 2013 by Daniora

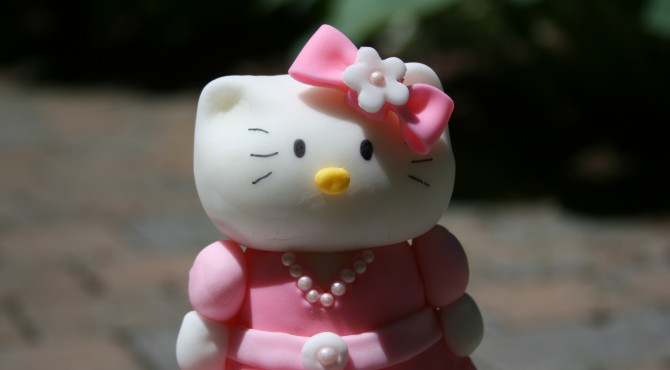
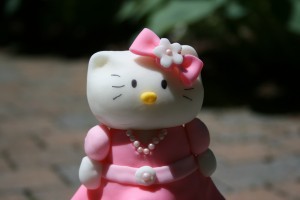
    Kitty with a sugar pearl necklace.

    Are we glossing over the fact that I haven’t posted anything in over a year and a half? Yes, yes we are.

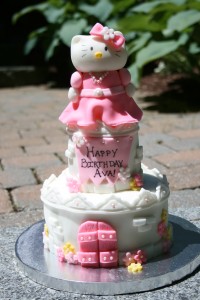
    My little buddy Ava turned 4 this spring. She wanted to have a Hello Kitty themed birthday. She asked her mom if Auntie Mimi would make her a Hello Kitty cake. Of course Auntie Mimi would make her a Hello Kitty cake.

    IMG_7239

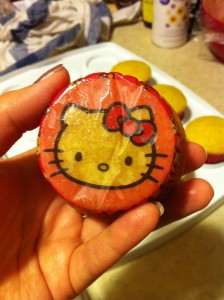
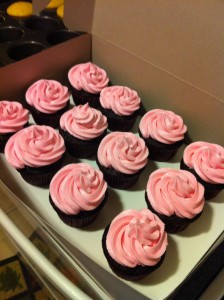
    Since Ava is our little princess, a castle cake seemed to be the right answer. My girl loves pink too, obviously. Since there were going to be a whole bunch of people there, I went ahead and made some Hello Kitty cupcakes to go with it.

    Picture 433Picture 432

    While I’m not the biggest fan of Wilton’s fondant (the taste, mostly), there were two Wilton products that I fell in LOVE with.

    The first is one of their silicone fondant press molds (I used the global one). They’re super easy to use and make really beautiful impressions. All I did was loosely press a piece of fondant into the mold, then used a small plastic rolling pin to roll it flat into the mold. Once the excess fondant had been rolled out, I could just peel the pieces out of the mold and trim around the edges. Simple!

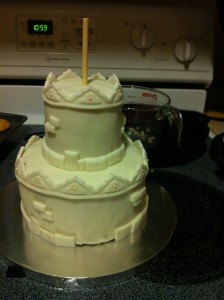
    Castle

    The basic castle shape. You can really see the details from the fondant mold.

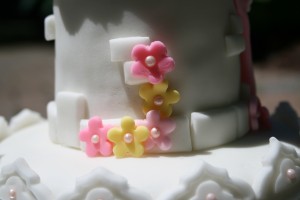
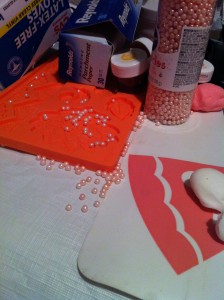
    The other are their sugar pearls. They come in a variety of soft colors (I got pink, of course). They were the perfect flower centers and accents to my fondant pieces. I just pressed them into the fondant while it was still soft, and they stuck perfectly. A word of caution. They are roly poly and will get away from you if you let them.

    Perfect centers for flowers

    Perfect centers for flowers

    Picture 429

    Sugar pearls….. everywhere.

    Kitty with a sugar pearl necklace.

    Kitty with a sugar pearl necklace.


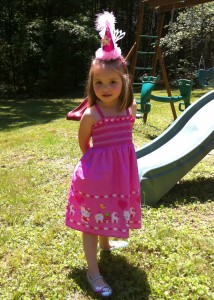
    In addition to the cake, because that’s never enough, I made a party dress for Ava.

    Ava's Party Dress

    Pretty in pink.

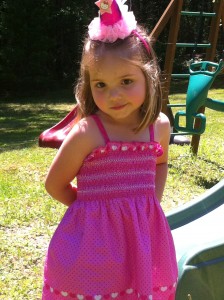
    It was my first time using the pre-smocked fabric. It was really super simple, but I don’t know that I’d do it again. It sort of feels like cheating. It’s really only one seam and sewing on the straps. It’s also fairly pricey, running around $0.50 an inch (I know that doesn’t sound like much, but it comes out to $18 a yard!) It did turn out pretty cute, though.  Of course, the attitude sells it.

    Attitude for days!

    Attitude for days!

    I love doing stuff for the kids’ birthdays. Any excuse for a celebration.


  4. Ava’s Pirate Birthday

    July 19, 2012 by Daniora

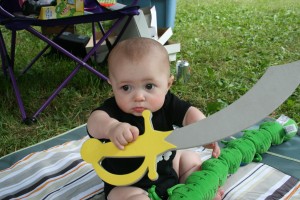
    One of the benefits to being “Auntie” to everyone’s kids while having none of my own is that I have the time to go completely overboard for birthdays and holidays. When my sweet, adorable girly Ava wanted to have a pirate birthday party, I was very excited. She is definitely a girl after my own heart.

    We just finished moving (well, are you ever really finished moving?) so I didn’t have the time or set up to do as many projects as I would have liked, but I did get to make Ava’s birthday cake.

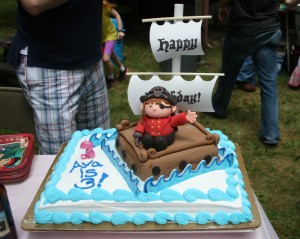
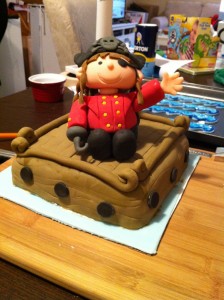
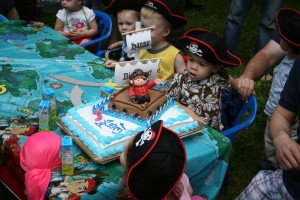
    Finished Pirate Cake

    The finished cake. I wish I had put the sails a little higher, but I’m really happy with how cute it came out.

    I based it off a cake from the 2010 Wilton Yearbook. The original was just a square cake with wood texture with a whole bunch of little brownie pop pirates on it. Since there were going to be quite a few people, we used a store bought sheet cake as a base.

    Having a summer birthday myself and having watched the horn slide off a unicorn and Rainbow Brite’s castle sag in the heat, I wanted to make sure things were going to stand up to the sun. I made the square boat base out of Rice Krispy treats and covered them with brown fondant. I put in the wood texture and added the rails along the top.

    The little girl pirate figure is made entirely out of fondant. She weighs a ton. Her little curls were my favorite part, and most of them actually made it to the time the cake was served.

    So, while the cake was the biggest of my piratey projects, it wasn’t everything. After Brian and I picked out some sweet gifts, I couldn’t be happy just wrapping them in pirate wrapping paper (Target has a really cute one, though).

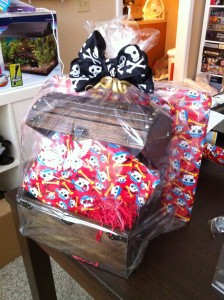
    Pirate Gift

    What’s better than a gift wrapped in pirate wrapping paper? A gift wrapped in pirate wrapping paper in a treasure chest, of course!

    I stained an unfinished treasure chest from Joann’s and put sticky felt on the bottom so it wouldn’t scratch their wood floors. Then I put in the wrapped gifts and put the whole shebang in a cellophane bag. When all was said and done, it really made quite an impact.

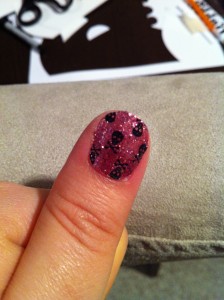
    Pirate Nails

    Ooh, sparkly!

    I also tried out those new Sally Hansen nail polish stickers. These were too perfect for me not to get! They went on almost as easily as the commercial would have you believe, and lasted for quite a while, even at work.

    Avast!

    Avast! Even Emma gets into it.

    I had so much fun at Ava’s pirate party. I even went in the bouncy house. Now I can’t wait for the next birthday party to come around.


  5. We’re Back!!

    September 7, 2011 by Daniora

    After a rather unexpected summer hiatus, we’re back to business here at The Nerdly Home.

    Grillin'

    So much summer grilling

    (What’s that? I said we’d be back on Monday? Well, that was before I realized Monday was a holiday.)

    We had one busy summer around here. The down side was that I missed out on my regularly scheduled postings. The up side is that now I have tons of cool stuff to write about!

    Coming soon on The Nerdly Home:

    • • More recipes and cooking adventures, including a silly amount of canning.
    • • Book reviews for those of you looking to improve your collection.
    • • Craft projects for the holidays, starting with Halloween.
    • • Costumes!
    • • The long awaited conclusion of the great potato growing experiment.
    • • Updates to The Nerdly Home site (once I get WordPress figured out)
    • • The Nerdly Home Store!
    • • Lots, lots more!


    I’m really excited to be back behind the keyboard to share some of my nerd life with you.


  6. Documenting your family vacation

    July 8, 2011 by Daniora

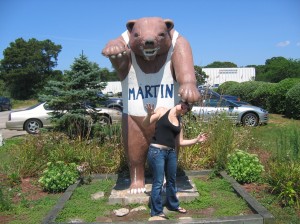
    Me and Martin the Bear on the Cape

    Me and Martin the Bear on the Cape, 2006

    There’s something to be said about the old way of dropping off a roll of film when you got back from a family vacation.  By the time you finished unpacking, the prints would be ready and you could relive the fun times of your trip all over again. The prints were then put into a photo album (doubles and embarrassing photos were hidden behind other pictures) and could be enjoyed at any time.
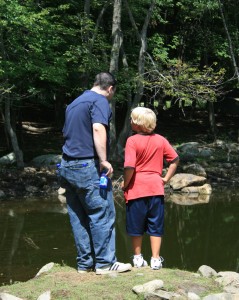
    The digital photography revolution has certainly done a lot of positive things for vacation photography.  First of all, there’s no need to worry about the cost of developing and printing all those pictures.  You’re free to snap away as long as the memory cards hold out.  Also, you don’t have the problem of picking up a set of prints only to discover that you’d forgotten to turn the flash on. You’ve got instant access to the photos you’ve taken, and it is much simpler to send those pictures to Grandma, often before you even get home. However, after the trip is through, more likely than not the digital files get relegated to a corner of the hard drive, never to be seen again.

    This should not be!

    There are plenty of awesome things you can do with your digital vacation photos, many of which don’t cost a penny. You certainly can handle your digital photos like film photos and order prints for the album or upload them to Flicr or your favorite social networking site, but there are lots of other options available too.

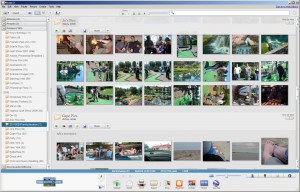
    Picasa

    Picasa Screenshot

    There may be no better photo organizing and tweaking software out there than Picasa.  It’s a Google program and is completely free to download.  It allows you to choose which folders it will always scan to look for new photos.  It has an easy to navigate interface that displays folders chronologically.  It has plenty of features for fixing your images, like straightening or adjusting contrast.  You can even add blur or film grain effects, or make your photos black and white or sepia toned. It is certainly not as full featured as a program like Photoshop is, but for the average user trying to organize and pretty up their snapshots, this is the perfect tool.

    One of the other great features of Picasa is that it shows if the file has geotag information, a security concern for some, and allows you to scrub that data in one easy step. Or, if you are a fan of geotagging your photos, you can also view a map of where all your pictures were taken. Once you’ve finished tweaking your pictures, you can then upload them to a Picasa album, make a collage, movie, or gift CD or even order prints from a number of providers.

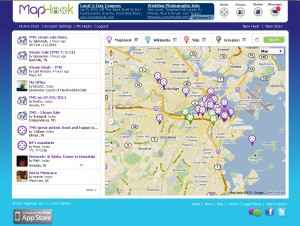
    MapHook

    MapHook Screenshot

    MapHook is a fantastic service available through the web or as an app on your iOS device (and coming soon to Android). You create a post, or Hook, with information on where you are and what you’re doing.  The GPS chip in your phone will pinpoint your location on a map, or you can adjust your location manually.  You can upload pictures to go along with your Hook.  When you’ve finished, you can choose a category for your Hooks and even pick a group to share them with.

    Once you’ve got a bunch of Hooks from your trip, MapHook gives you the ability to link them all together into a story.  It’s a really fantastic way to put all your pictures and description of what you’re doing into one place.  You can even create a private group, say your family, and post your Hooks so they will only be visible to those people.  It would be a great way for everyone to document an event, like a family reunion, from their perspective. Imagine each family group making Hooks of their travels to wherever the reunion is and then documenting everything that goes on at the event. No matter how hard you try, you’re bound to miss taking a photo of some part of a big event, especially when there are  a lot of people. By combining all your Hooks into a story and publishing them to a group, everyone is able to share their photos and memories with everyone else.
    Another handy MapHook feature is being able to browse Hooks that are near your location. If you’re traveling in an unfamiliar area, you can check out Hooks that other users have made to find places to eat or things to do. Several of the categories have built in forms that help users to rate restaurants or places that they’ve visited. Even if you wind up in a place where you don’t have any internet connection, you can always build your Hooks and save them as drafts. That way, when you’re connected again, you can publish them all without risking forgetting the details of your adventure.

    Blurb

    Blurb Screenshot

    Once you’ve got your photos prettied up and organized, they are still sitting on your hard drive.  You can always get prints for the album or scrapbook, but if you’re feeling a little more ambitious you can order a hardcover photo book from Blurb. One of the really great features about Blurb is that there are several ways to create your book depending on your level of technical skill.  They have an online book builder that works very well.  You can upload your photos from your computer or access them directly from your Picasa or Flicr account. From there, you can choose to let the program place the photos for your or you can manually choose which photo goes where. They also offer a free downloadable program to build your book. It works very similarly to the online book builder, but is more fully featured and doesn’t rely so heavily on having good bandwidth for it to work. If you are particularly digitally savvy, you can upload a pdf directly or use their brand new plug in for Adobe InDesign.

    Blurb offers a variety of bindings and paper qualities.  You even have the ability to share your book with others or put it up for sale on their store. The price of your book is based on the quality, size, and number of pages.  They do offer discounts when you order multiples of the same book. When all is said and done, you wind up with a professionally printed photo book that would look great on anyone’s coffee table.

    Brian and Nick

    Brian and Nick at the zoo, 2005

    Summer is a time to get out of the house and go on adventures.  Make sure you document them well so you can relive all those good times for years to come.


  7. Sam’s Ork Birthday

    July 6, 2011 by Daniora

    Last month, one of my best friends, Sam, turned 30.  In honor of the occasion, we threw him an Ork birthday party.

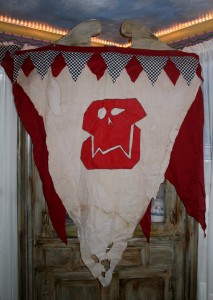
    Ork Banner

    An Ork war banner I made. It would have been hanging outside had it not been pouring rain.

    Along with some of our other friends, Sam enjoys playing Warhammer 40k, especially Orks.  If I had to wager a guess, I’d say it’s more the attitude and less the gameplay that draws him to the green-skinned tide of destruction.

    For those of you not in the know, Warhammer 40k is a tabletop game played with miniature models of the different troops and vehicles.  You command your own army of miniatures, which you have lovingly assembled and painted, and march them across the table to victory or death.  Some games involve an objective but most are just a fight to the death. Combat is determined by a roll of the dice and he who rolls well wins.

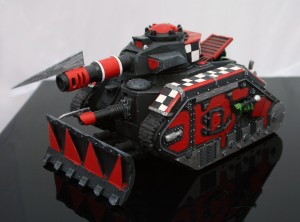
    Ork Wartruk

    An Ork tank that I built and painted for Sam a few years ago.

    There are several different factions one can choose from when starting a Warhammer army.  There are the Space Marines, the insect like Tyranids, and the Chaos Daemons summoned from the great beyond to name but a few.  Sam plays Orks.  Orks are the greenest, fightingest, drinkingest army there is.  They believe that by painting a vehicle red, it will be able to move faster… and it works.  They speak with an over the top Cockney accent and any victory truly seems to come by luck rather than by ruthless military strategy.

    We had several small children in attendance, and for them I had made Grots Union t-shirts (Grots are little goblin-like creatures that the Orks use as slaves… and frequently ammunition). They were all members of Union Local 608, June 8th being Sam’s birthday.

    Grot shirt

    The Grots Union shirt, modeled here by Miss Ava.

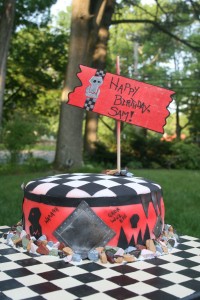
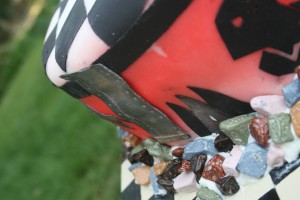
    Because checkerboard patterns are a part of the Ork decoration, I was able to use some racing party supplies to augment the banner and pennants that I had made from scratch. The centerpiece of my Orky theme, however, was the cake.

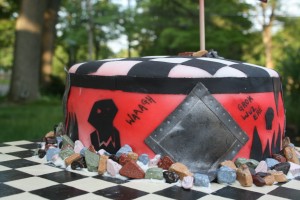
    Ork Cake

    I’m not going to lie. I’m pretty proud of this one.  I’m not a huge fan of fondant, at least not from a taste standpoint, but I do enjoy using it. There are some things that buttercream and royal icing just won’t do. This time I also used the new Wilton icing sheets.  (I’ll do a whole separate post on that. Awesome new product!) By brushing the pieces of the icing sheet that I had cut out with metallic color dust, I was really able to get pieces that looked like metal. I found some fantastic candy rocks at a local shop. They’re actually very similar to M&Ms, just rock shaped. They looked great all piled together.

    Ork Cake DetailOrk Cake Detail

    One of the most exciting moments of the party for me was when people had to ask if the rocks and metal bits were edible. That was when I knew I had done a good job.

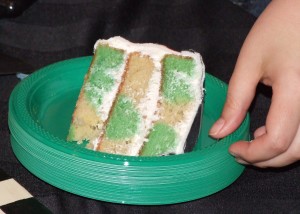
    For the interior, I decided to keep with the checkerboard theme using the Wilton Checkerboard Cake Pan Set. Instead of doing the traditional vanilla and chocolate checks, I opted to do the whole thing in vanilla, tinting half of the batter green. It was a pretty warm day when I baked, and the batter was a little runnier than I would have liked, so my checks were a little off kilter.  Fortunately, it fit right in with the Ork theme.

    Checkerboard Cake

    Checkerboard cake

    All in all, it was a terrific party.  I wish the weather had been better, both on the day of the party and while I was trying to decorate the cake. I have even more admiration for my mother who made my birthday cake every year in the middle of July without air conditioning. (Thanks, Mom.) There are plenty more nerdly birthday celebrations on the horizon, and I’m sure many of them will include more nerdly baked goods.


  8. Ukrainian Easter Eggs

    April 13, 2011 by Daniora

    Each year when Easter approaches, I get it into my head that I am going to make Ukrainian eggs (otherwise known as pysanky).

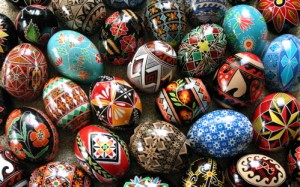
    A collection of Ukranian EggsFor those not in the know, Ukrainian eggs are made by meticulously covering the part of the design on an egg that you wish to remain white with beeswax, then dipping it in dye (usually yellow is first).  Then parts of the design that are to remain yellow are masked off with wax and the egg is dipped in the next color.  This continues with progressively darker dye colors until the final dip in black dye. After all the colors have been dyed, the wax is melted off over a candle to reveal the completed design.

    There is a tremendously steep learning curve here, not only because of the technique of using the kistka to apply the wax is a little tricky, but also because you have to have planned your design out completely before you even start.  This is the part I’ve never been good at.  I’m always very eager to get started, but I never have a plan.

    Wikipedia has a really good description of traditional pysanky motifs and color meanings.  It’s a pretty good place to start when designing eggs of your own.  Flickr also has a very large group devoted to Ukrainian eggs with some really beautiful examples. If you want to give this a try for yourself, there are plenty of places where you can pick up supplies. PysankyUSA has an exhaustive selection of tools and supplies, along with kits so you can get started right away. In terms of instruction, I really like LearnPysanky.com. The woman who writes it clearly has a passion for the art form.  She’s got links to where you can buy supplies, helpful hints, and even where some workshops are being held.

    Because of the amount of work that goes into creating one of these eggs, you’ll want to blow out the insides so that they can be kept from year to year.  I’ve seen artists do this after the design is completed which seems absolutely crazy to me. I would hate to put in all that work only to have the egg crack while trying to empty it out.  You can also purchase already blown eggs of all sizes, from quail to ostrich.  The only tricky part about working with already blown eggs is that you’ll have to cover the holes with wax to prevent them from filling up with dye.

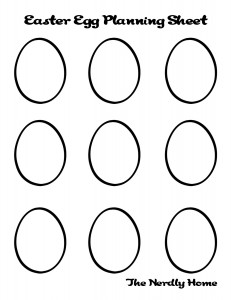
    Egg Design WorksheetWhether you’re going to try your hand at making these beautiful Ukrainian eggs or if you’ll be decorating some other way, I’ve made up a little egg design sheet so you can plan your eggs ahead.  Maybe, just maybe, this will be the year when the stars align and I actually put wax to egg to try this out for myself.