RSS Feed

Posts Tagged ‘cooking’

  1. Poulet en Croûte

    February 4, 2015 by Daniora

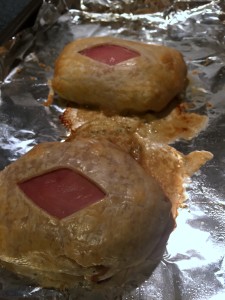
    IMG_6994

    Today’s recipe is another one from my childhood. My mom used to make this for us. It was one of those meals that always felt really special. I’ve put a couple of little twists on it myself, but at it’s heart, it’s the same.

    So, ‘poulet en croûte’ translates to ‘chicken in crust’. Loses some of the mystique in English, doesn’t it?

    The name is simple and the execution is even simpler. The beauty of this recipe is how impressive it looks, especially for the amount of effort.

    The ingredient list is short and sweet:

    Just four ingredients...

    Just four ingredients…

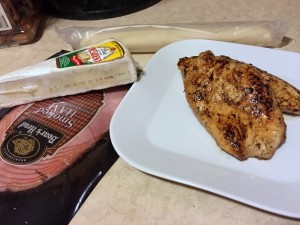
    • Chicken breast, one per serving. For this particular application, I used Perdue marinated chicken breasts. They were the perfect size for wrapping in the pie crust and were incredibly flavorful.
    • Sliced ham, one or two slices per serving. Mine was rather thinly sliced, so I opted for two.
    • Brie, sliced about 1/4″ thick. I usually use plain, but this time I accidentally grabbed herbed brie. I noticed my mistake and went to put it back, but decided that more flavor couldn’t be a bad thing.
    • Pie crust. I use the refrigerated kind that comes rolled. Each crust will be enough for two servings.

    That’s it. Now to put them together.

    Browning the chicken.

    Browning the chicken.

    The first step is to brown both sides of the chicken breast. This will add flavor and help sear the juices into the chicken. I had my pan a little hot, so some of the herbs from the marinate got a bit scorched, but there was no real harm done.

    Next, unroll your pie crust. Letting it come to room temperature first makes this a far easier task. Slice the crust in half. If you’re extra concerned about presentation, you can reroll each half to make it a more square shape. This will help later when it’s time to wrap the chicken, but isn’t strictly necessary.

    Ham...

    Ham…

    ... and cheese.

    … and cheese.


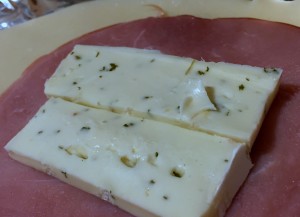
    In the center of the crust, place your ham. On top of that, place your brie. I was feeling saucy, so I put two slices. There is the possibility (well, probability, really) that no matter how well you wrap your chicken, some of the melted brie is going to ooze out. So, starting with more will increase the amount we’re left with, right? Yup, logic sounds good to me.

    Ugly.

    Ugly.

    Pretty!

    Pretty!


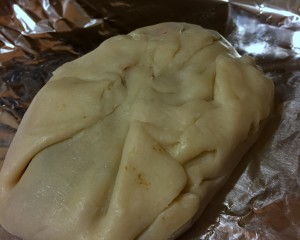
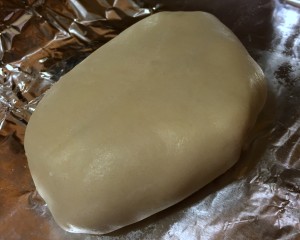
    On top of the brie, place your browned chicken breast. Gently wrap up the edges of the pie crust. This is the part where you’ll realize that rerolling the crust to be the right shape might have made things easier. Never fear, however, it doesn’t matter how ugly this seam is because it will be on the bottom. Seal it as well as you can to keep the brie from escaping.

    Ready to go!

    Ready to go!

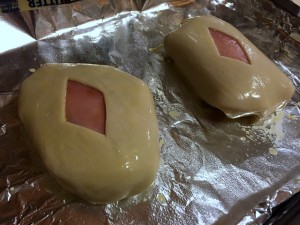
    Place the packets seam side down on a baking sheet lined with foil (because escaping brie). If you’re feeling fancy, and I frequently am, you can use a paring knife to cut a diamond shape in the crust, exposing the ham underneath. Brush a quick egg wash on the crust to help give it a golden finish.

    I warned you about the escaping brie.

    I warned you about the escaping brie.

    Bake them in the oven for 25 – 30 minutes until the internal temperature of the chicken reaches 165°. Plate and serve. Simple. Elegant. Delicious.

  2. Squash Pudding

    January 19, 2014 by Daniora

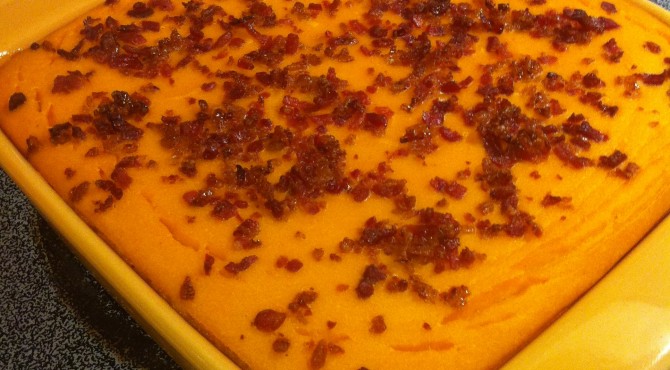
    SquashPudding

    I think it’s true of every family that there are certain dishes that we grow up with that we assume everyone else knows about too. For me, squash pudding is probably top of the list.

    bill-cosby-jell-o-pudding

    Here in the States, when we hear the word “pudding”, it generally conjures images of Bill Cosby selling SnakPacks of vanilla and chocolate swirl. This particular recipe uses the British meaning of pudding, savory ingredients bound together with eggs and flour which are baked, boiled, or steamed to hold them together.

    Squash puddings takes butternut squash, which is delicious and perfectly good for you all on its own, and transforms it into something calorie laden and irresistible. One of my nephews refuses to touch vegetables; I’ve seen him pick tiny pieces of chopped spinach out of pasta sauce. He will, however, sit down to a heaping pile of squash pudding and devour it without blinking an eye.

    Squash Pudding

    Ingredients:

    • 8 Tbs butter
    • 2 tsp salt
    • 5 Med butternut squash (8 cups mashed and drained)
    • 1 Tbs dried onion flakes or fresh minced
    • 4 tbs dried milk
    • 4 eggs
    • 4 tbs Wondra flour
    • 4 tbs brown sugar


    1.  Mix all ingredients together, making sure butter melts completely. Beat until smooth.
    2. Spread in baking dish and sprinkle with bacon bits (if desired). I am personally pretty done with the whole “bacon makes everything better” bit, but in this case, I really do recommend it. The salty bacon really does a lot to balance the sweet squash.
    3.  Bake at 300 degrees for 1½ hours.


    A few notes from my own personal experience.

    First of all, this recipe works equally well using frozen squash. It’s so convenient just to grab a few of the oh-so-attractive frozen bricks from the store and throw them into a pot. I’ll admit that I almost never go through the trouble of boiling and mashing fresh squash anymore.

    Secondly, a word on Wondra flour. Wondra flour is ground superfine, designed to mix more smoothly into liquids like gravy and prevent clumps. In a pinch, I’ve used regular all purpose flour instead and have yet to encounter a problem. I find a good whisking manages to eliminate any little clumps that might appear.

    Thirdly, and very importantly, remember to remove the squash from the heat when you whisk in the eggs to prevent them from cooking before they’re mixed in. Not that I’ve ever done that, mind you…

    This is one of my favorite side dishes and is one of those simple, handy recipes that can be prepared in advance and reheated for mealtime.


  3. Carrot Pineapple Cake

    November 13, 2013 by Daniora

    FinishedCupcake

    Guys, I’m not exaggerating here when I tell you that this is the most delicious carrot cake you will ever eat. That’s not hyperbole, it’s just the honest truth.

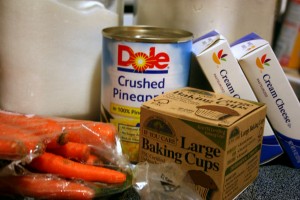
    Preview

    The original recipe is designed to be  bundt cake with a vanilla glaze. It also works perfectly well as cupcakes with cream cheese frosting. The baking instructions below are for the bundt cake. For cupcakes, I cook them for about 25 minutes, rotating halfway through. (You do rotate your pans while you’re baking, right? Good.) I was worried that they were taking so long to cook, but I fill my cupcakes pretty full and this particular batter just takes a while to cook. Keep an eye on them; better to check on them more often than have them burn.

    ReadyfortheOven

    Some people like nuts or raisins in their carrot cake. While that may not be my personal preference, it’s easy to add them to this recipe; just mix them in at the end. I like to add about a quarter teaspoon of cloves in addition to the nutmeg and cinnamon. Cloves are my favorite spice, and they give it a warm sweetness.

    CupcakeTray

    I’m serious, though. This is the best. If you enjoy carrot cake even a little, you owe it to yourself to bake these (or get someone else to bake them for you).

    SoloCupcake

    Carrot Pineapple Cake

    • 3 cups all purpose flour
    • 2 cups sugar
    • 1 teaspoon baking powder
    • 1 teaspoon baking soda
    • 1 teaspoon salt
    • 1 teaspoon nutmeg
    • 1 teaspoon cinnamon
    • 3 eggs, beaten
    • 1-1/4 cups cooking oil
    • 2 teaspoons vanilla
    • 1 cup (8.5 oz can ) crushed pineapple, undrained
    • 2 cups grated raw carrots, loosely packed
    1. Preheat oven to 325. Grease bundt pan.
    2. Mix together flour, sugar. baking powder, baking soda, salt, nutmeg and cinnamon in a large bowl.
    3. Make a well in the center of the dry ingredients and add eggs, oil and vanilla. Blend thoroughly.
    4. Stir in undrained pineapple. Add carrots and pecans. pour into prepared bundt pan.
    5. Bake for 1 to 1-1/4 hours until cake tests done.
    6. Cool 10 minutes in pan, then turn out and finish cooling on wire rack. Add vanilla glaze.

    Vanilla Glaze

    • 1 cup sifted confectioner’s sugar
    • 1 tablespoon milk plus 1/4 teaspoon vanilla
    • 1 tablespoon light corn syrup
    1. Combine all ingredients and beat until smooth. Use spatula or large spoon to put glaze on top of cooled cake. Spread around top of cake with a knife. Glaze should run down sides slowly.

    Cream Cheese Frosting

    • 16 ounces cream cheese, room temperature
    • 1 cup confectioners’ sugar
    • 2 teaspoons pure vanilla extract
    1. Put cream cheese into the bowl of an electric mixer fitted with the paddle attachment. Mix on medium-high speed until smooth. Reduce speed to medium-low, and mix in sugar and vanilla. Raise speed to medium-high, and mix until fluffy, 5 to 7 minutes.

  4. Maraschino cherries, version one

    November 7, 2013 by Daniora

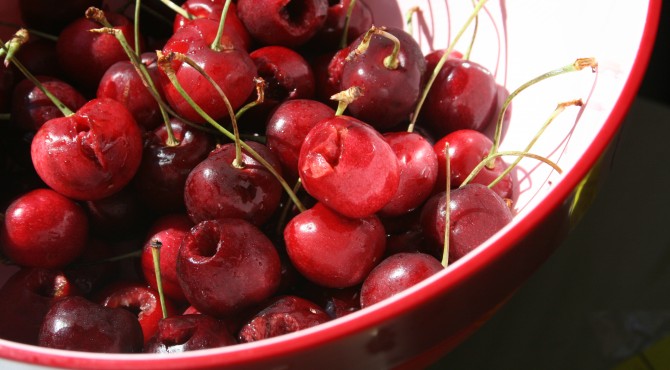
    Fresh Cherries


    I do not like maraschino cherries.

    This is a fact. I used to pick them out of my Shirley Temples, offer the ones off my ice cream sundaes to anyone that wanted them, and sipped around them in my girlie cocktails. Well, it turns out that I don’t like commercially made maraschino cherries.

    Cherries

    Making your own maraschino cherries is a fair amount of work. Fresh cherries can be pricy, and they all need to be washed and pitted (messy work). Then they have to be cooked with a variety of ingredients, including pomegranate juice (also pricy) and fresh orange zest. Then once you’ve got these cherries all cooked, you have to put them in jars and into the fridge for three days.  As if that weren’t enough, with no preservatives, they won’t stay fresh for long. This seems like an awful lot of trouble for something that can cheaply and easily be bought in a jar. I mean, how bad could they be?

    Cherry Label

    Oh.

    Okay, then. Homemade maraschino cherries it is! In a discussion with a group of friends, we decided that calories from miniature foods don’t count. I countered that I make things from scratch for that same reason; it might not be good for me, but it’s way better than if it were commercially made. For some foods, like these cherries, this is especially true.

    Real maraschino cherries are made by soaking cherries in maraschino liqueur. Who knew? However, most of my goodies tend to be enjoyed by small children, so for most applications, those cherries are not the ones that I need.

    This version of cherries is alcohol free, and I think very tasty. You can add red food coloring to make them look more like store bought, but I have a real distaste for artificial colors. Cherries are red enough on their own.

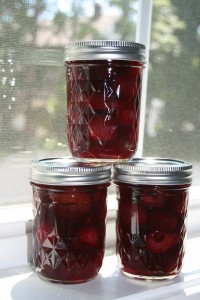
    Finished Product

    Homemade Maraschino Cherries (adapted from the recipe from Cupcake Project)

    Ingredients

    • 1 1/2 cups water
    • 1/2 cup pomegranate juice
    • 1 cup sugar
    • 3 1/2 fluid ounces lemon juice (juice from about 3 lemons)
    • pinch of salt
    • Peel from one large orange
    • 1 cinnamon stick
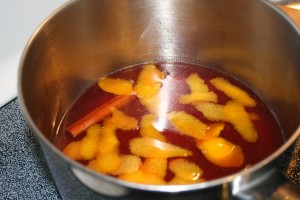
    • 1 pound pitted cherries (invest in a cherry pitter, and don’t wear white)Syrup
    • In a medium-sized saucepan over medium-high heat, add everything except the cherries.
    • Bring to a boil.
    • Reduce the heat and simmer until the sugar has dissolved, stirring periodically.
    • Add the cherries.
    • Simmer on low heat for 10 minutes or until the syrup has a bit of a cherry flavor. You don’t want to cook the cherries – you just want to bring out some of their flavor. However, I can attest that cooking the cherries really doesn’t hurt. They just turn out a little softer.
    • Remove the pan from the heat and transfer the entire contents to a bowl (so it doesn’t continue cooking).
    • Let cool to room temperature.
    • Transfer to an air-tight container, like glass jars, and refrigerate.
    • Let the flavors develop for about three days, then enjoy!

    Waiting the three days for the cherries to be ready is tough. Of course, they taste pretty darn good straight from the pan too.  The syrup is delicious. I’ve made homemade grenadine as well, but the syrup from the cherries would be just as good for making a mean Shirley Temple. These are absolutely worth the effort, and you will never buy a jar of scary cherries again.


  5. A brief word about spices

    January 23, 2012 by Daniora

    Let’s have a little talk about spices and what makes them great. There are so many different herbs and spices out there, and they can be used to add a lot of flavor without adding fat or salt. They are what give different culinary styles and regions their own unique flare. Spices can get pricey, especially for some of the more exotic ones. However, you don’t have to spend a lot to get the most out of your flavorings. One of the biggest indicators of a spice’s taste is freshness.

    Allow me to present an example:

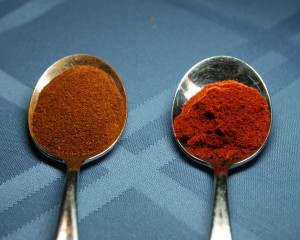
    Here are two spoons of paprika. The one on the left is from a jar that is of questionable age and has been stored near the stove. The one on the right is from a freshly purchased jar. They are both McCormick brand paprika from the grocery store, nothing fancy. They were the same price. The only distinction is freshness, and I think the differences are readily noticeable. In addition to their appearance, the new paprika definitely had a stronger aroma and definitely tasted stronger and richer.

    The lesson for today: You can spend a lot of money to buy the highest quality spices and grind them yourself… but you don’t have to. Grocery store spices are perfectly serviceable and delicious. Whether you spend a lot or a little, buy in smaller amounts so that they’ll always be fresh and store them out of direct sunlight and away from heat.


  6. Old Fashioned Apple Crisp

    September 16, 2011 by Daniora

    I hadn’t really intended to do another recipe post this week. When I woke up to a perfect autumn day and a bag of freshly picked apples, I knew a crisp was in the cards for today.

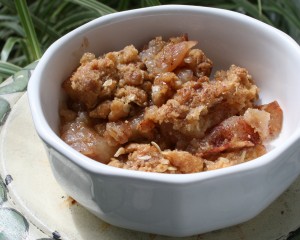
    Apple Crisp

    In general, I don’t really like pie crust.  When buying pies from the local orchard, I always get crumb topped and, more often than not, the bottom crust of my serving gets thrown away. As a result, apple crisp is one of my favorite fruit goodies.

    The fantastic thing about this recipe is that you can adapt it to suit your needs. If your apples are really sweet, you can decrease the amount of sugar in the filling. You can alter the spices if you like. You can leave out the cloves or decrease the amount of cinnamon. I’ve even been known to add a dash of ginger when I’m feeling a little exotic. The warm spices and zesty citrus guarantee delicious results even when using less than perfect apples. Plus, the topping has oatmeal in it; that makes it a breakfast food, right? Right?

    Old Fashioned Apple Crisp

    Filling:

    • ● 5 pounds McIntosh or Macoun apples
    • ● Grated zest of 1 orange
    • ● Grated zest of 1 lemon
    • ● 2 tablespoons freshly squeezed orange juice
    • ● 2 tablespoons freshly squeezed lemon juice
    • ● 1/2 cup granulated sugar
    • ● 2 teaspoons ground cinnamon
    • ● 1 teaspoon ground nutmeg
    • ● 1/2 teaspoon ground cloves


    For the topping:

    • ● 1 1/2 cups flour
    • ● 3/4 cup granulated sugar
    • ● 3/4 cup light brown sugar, packed
    • ● 1/2 teaspoon kosher salt
    • ● 1 cup oatmeal
    • ● 1/2 pound cold unsalted butter, diced


    1. Preheat the oven to 350° F. Butter a 9 by 14 by 2-inch baking dish.
    2. Peel, core, and cut the apples into large wedges. Combine the apples with the zests, juices,
      sugar, and spices. Pour into the dish.
    3. To make the topping, combine the flour, sugars, salt, oatmeal, and cold butter in the bowl of an electric mixer fitted with the paddle attachment. Mix on low speed until the mixture is crumbly and the butter is the size of peas (this can also be done by hand). Scatter evenly over the apples. Dust lightly with a pinch of cinnamon.
    4. Place the crisp on a sheet pan and bake for 1 hour until the top is brown and the apples are
      bubbly. Serve warm (with whipped cream or vanilla ice cream, if desired).

  7. Grilled chicken wings

    September 14, 2011 by Daniora

    In honor of the first weekend of the regular football season, we’re going to talk about one of the quintessential football snacks: chicken wings.

    Grilled chicken wings

    Cooking chicken wings without using a deep fryer is a time consuming and intensive process.  There’s a lot you have to do to make sure that the skin winds up crispy. Until recently, I followed Alton Brown’s method of first steaming the wings and chilling them uncovered in the refrigerator before roasting them in the oven. It’s a process that takes hours and hours, but ultimately you wind up with good results.

    This summer, I decided that we should try grilling the wings. Our local market, Butcher Boy, has marinated wings for sale, as well as big bags of plain wings. I picked up a package of teriyaki marinated wings for our first experiment. Those first results were a little hit and miss.

    The biggest problem we encountered was that there were a lot of flare ups on the grill from the chicken skin, and we didn’t have a spray bottle of water handy.  A rookie mistake, I know, but most of our other grilling hasn’t really required this sort of preparation. The second problem was that the wings stuck to the grill, especially with the marinade on it.  The flavor of the finished wings was good, but the teriyaki flavor really got lost.

    Grill Flare Up

    A spray bottle is a necessity to keep flare ups under control.

    Our second attempt yielded much better results. We started with plain wings, got some Pam for grilling and liberally sprayed down the grill before cooking, and coated the wings in sauce after cooking. Something about the char from the chicken mixing with the sauces really added a new level of flavor to the wings. I made two types of sauces, Alton Brown’s orange glazed wings and a basic buffalo (see below). Both were outstanding on the crispy skin (even though the char did turn the buffalo sauce a sort of muddy brown color).

    Grilling wings is still a fair amount of work.  It takes constant vigilance to combat flare ups and make sure that all the little wings get crispy and don’t stick to the grill.  It is, however, much faster than the steam-and-roast method and has much better results. Depending on the size of your grill, it can be a great way to cook up food for a large crowd.

    Basic Buffalo Sauce

    I’m not a huge fan of  very spicy buffalo wings. I avoid anything with the words “volcano” or “atomic”. I like them to have a bit of heat, but still retain a depth of flavor. You can substitute any hot sauce of your choice and increase the amount to your desired heat level.

    • 3 ounces unsalted butter
    • 1 small clove garlic, minced
    • 1/4 cup hot sauce (I prefer Frank’s)
    • 1/2 teaspoon kosher salt


    1.  Melt the butter in a small bowl along with the garlic.
    2. Pour melted butter and garlic, along with hot sauce and salt, into a bowl large enough to hold all of the chicken and stir to combine.
    3. Remove the wings from the grill and toss with the sauce. Serve warm with a side of blue cheese dressing if desired.


    As the season progresses, stay tuned for lots more football snacks and party ideas.


  8. Kitchen tools I can’t live without.

    April 6, 2011 by Daniora

    It doesn’t matter what you’re trying to do; if you don’t have the proper tools, you’re going to have a hard time getting really great results.  For me this is especially true in the kitchen.  The basics are important, like a good knife and a sturdy set of pans, but these are a few of the extra things that I now find I can’t live without.

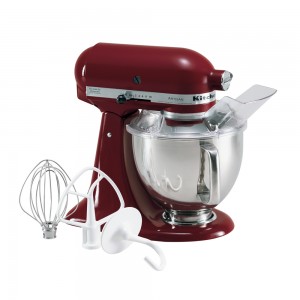
    Kitchenaid Stand MixerStand Mixer

    Sure, you can cook without a stand mixer.  Be warned, though, once you start using one, you just can’t go back. We’ve had a KitchenAid stand mixer for as long as I can remember. I’m fairly certain that my mother’s mixer, still in great working order, is older than I am.  The standard attachments that come with it are a mixing blade, a dough hook, and a whisk.  With those three you can do pretty much anything. For me, it’s a must for cookies and bread.  I use it for fresh whipped cream and homemade marshmallows.  My mother even uses hers to mix up meat and spices for meatloaf or hamburgers

    For the KitchenAid mixers, there are lots of bonus attachments you can get too.  I’ve got the ice cream maker and the slicer.  There is also a pasta maker, sausage stuffer, ravioli cutter.  It seems like new ways to use my mixer are coming out all the time.  A stand mixer may be a fairly significant initial investment for your kitchen, but if you plan on doing any large amount of cooking, I highly recommend picking one up.

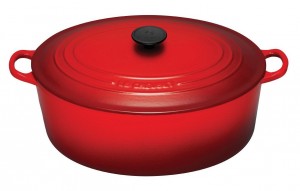
    Dutch OvenLe Crueset Dutch Oven

    This is my go to pot for soups and stews.  It’s a heavy duty cast iron pot with an enamel coating inside and out.  It’s oven safe which makes it perfect for stews that need to bake in the oven. The enamel makes it really easy to clean even when food gets burnt onto the bottom. There are a large variety of sizes all the way down to little personal sized pots (someday I will figure out a use for those).  I’ve got the 5.5 quart size which I find to be pretty perfect for just about everything I make.  I’ll probably pick up a slightly smaller one sometime for those few occasions when the 5.5 quart was really too big. There are tons of designer colors if you’re one of those people who likes all their kitchen stuff to match.

    Le Crueset is the most common brand, though there are plenty of others out there.  They can be really pricey at kitchen stores. I’ve gotten mine at Home Goods.  They’ve been factory seconds, but there’s really not a whole lot wrong with them.  The one I currently use had a little bubble in the enamel on the outside.  It was just enough for the factory to send it to the discount store, but certainly not anything that affects the cooking at all.  If you do pick one up at a discount, just give it a good check to make sure that the inside is up to snuff.  If it is, you should be all set.

    Immersion BlenderImmersion Blender

    This is a fairly new addition to my kitchen arsenal.  I don’t use it all that frequently, but when I do, I’m very glad to have it; there is no other tool that would get the job done as quickly and easily.  The immersion blender is basically the blade from a standard blender on the end of a stick instead of at the bottom of a carafe. I most often use mine when making soups to take them from chunky to a little creamier.  Instead of having to ladle hot soup into a blender in batches, I can just use the immersion blender on the whole pot and get the perfect texture in no time.  It give you a lot more control over just how much you blend.  If you were making something really smooth, like tomato soup, I think an immersion blender may not be the best choice. However, for things like thickening up lentil soup, it does the job perfectly.

    Some versions come with other attachments, like whisks or bowls so that they can be used in place of a larger food processor.  They’re not particularly expensive and don’t take up much space, so I think they’re a pretty great addition to any kitchen.

    Pepper GrinderPepper Grinder

    This might seem like an odd addition to the list, but I can’t stress the importance of fresh ground pepper.  All spices are better when they are ground fresh when you need them.  This isn’t always the most convenient thing.  However, pepper is so important when cooking that it is imperative that you have a good pepper grinder filled with high quality peppercorns.

    The most important factor when picking out a grinder is to make sure that it grinds evenly.  If it is also adjustable for a coarser or finer grind, that’s great too.  As long as all the pieces are roughly the same size, you’re in good shape.  I actually prefer a grinder with a smaller reservoir for peppercorns. It means that you’ll be refilling it more frequently which keeps the pepper fresher.  We keep two grinders in the house; one is for the kitchen, the other for the dining table.  It keeps us from having to find the pepper every time we need it.

    This is a brief list of the tools that will always have a home in my kitchen.  I use them often and they make cooking so much easier and more enjoyable.