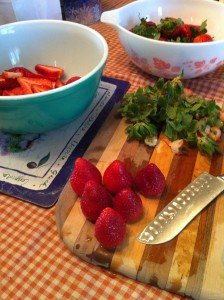
 We here at The Nerdly Home are all about making things from scratch whenever possible. That can be tough to do when things get busy. Fortunately, there are plenty of things that can be made ahead and stored for later. I’ve just started getting into canning, and I’ll admit that I haven’t quite gotten the hang of it. There always seems to be one little step that I forget and everything has to be stored in the fridge instead of on a shelf. I’m definitely improving, though.
Since my canning skills are improving, I figured it was about time for me to start making things from scratch to put in the jars. After going through the wonderful book Canning and Preserving with Ashley English (Homemade Living), I decided that her recipe for Strawberry Jam would probably be the simplest. In spite of the weather, it is spring. Spring is the best time for strawberries. Just be sure that if you’re making anything with strawberries, be sure to get organic. They cost a bit more, but strawberries are one of the dirty dozen foods that retain the most toxins from pesticides.
Simple Strawberry Jam
- 4 pints strawberries, hulled and sliced
- 2 cups granulated sugar
- 2 tablespoons bottled lemon juice
1. Place two small plates in the freezer. These will be used later to test for gelling.
2. In a large nonmetallic bowl, add the strawberries, sugar, and lemon juice; stir, cover loosely with a kitchen cloth, and set aside to macerate at room temperature for 2 hours.
3. Sterilize 3 half-pint mason jars, lids, and screw rings. Fill a canner or large stockpot with water, and set over medium-high heat. Bring just to the boiling point. Place the lids in a small saucepan, fill with water, bring to a boil, turn off the heat, and set the pan aside.
4. Transfer the strawberry mixture to a medium stainless-steel pot. Bring to a boil over medium-high heat and boil for 20-25 minutes, until the mixture begins to thicken. Stir frequently an watch the pot carefully to prevent to contents from boiling over. Skim off any foam that rises to the top.
5. Test for gelling. Remove a plate from the freezer and spoon about 1 teaspoon of the strawberry mixture onto it. Place the plate back in the freezer and wait 2 minutes. Remove from the freezer and push the edge of the jam with your fingertip. If the jam has gelled properly, the surface will wrinkle a bit. If it fails to wrinkle, or is obviously still runny, boil the jam for 5 minutes longer, and then repeat the test.
6. Place the hot, sterilized jars on top of a kitchen cloth on the counter. with the help of a canning funnel, ladle jam into the jars, reserving 1/4-inch headspace. Use a nonmetallic spatula to remove any trapped air bubbles, and wipe the rims clean with a damp cloth. Place the lids and screwbands, tightening only until fingertip-tight.
7. Using a jar lifter, place the jars into the canner. Process for 10 minutes in a boiling bath.
That’s it. Simple ingredients and simple to make. The only major problem I had with making the jam was skimming off all the foam. There was quite a bit of it and I really didn’t have a good tool for getting it all. As a result, I wound up with some bits of foam in my jars compromising my canning. So, all three jars went into the fridge. I doubt the jam will be around long enough to risk spoiling.
This jam is delicious. I’m having a hard time not just grabbing the jar and a spoon and eating all of it. Because it doesn’t have any added pectin, it doesn’t set up quite as firm as commercially made jams. Be sure to have a napkin handy if you’re putting lots of this on your sandwich. I’m looking forward to using it to make something tasty like danish or turnovers.